Hello everyone.
I recently bought someone a little gift that came in a flip top style box and thought it would be fun to make my own version. As the box was a gift, I couldn’t disassemble it to find out how to make my own! So I turned to Pinterest and quickly found a tutorial from the fabulous Sally Stampers – you can check it out here
I wanted to make my box for some mini hand creams, which are light enough to use paper instead of card and I decided on using Bird Ballad designer series paper…

I’ve used 3 different designs from the paper pack and changed the ribbon on each one too.
I started with paper trimmed to 4-1/2″ x 5-3/4″ and scored this on the short side at 3/4″, 2″, 2-3/4″ and 4″. I then scored on the long side at 3/4″, 4-1/4″ and 5″
Here’s the cutting guide…

With the single horizontal score line on the short side at the bottom, cut up the score lines to create the tabs for the base. Remove the skinny rectangle in the bottom corner.
Remove the top 2 sections of the skinny panel and the same 2 sections on the next panel. You can then cut the horizontal score lines to create tabs for the lid as shown above.
Add glue to the skinny panel and attach to the back of the first panel to form the body of the box. Fold in and glue the tabs to create the base.
Form the lid of the box as shown below and then cut the edges diagonally…


The completed box now measures 1-1/4″ x 3/4″ x 3-1/2″ and fits a 10ml tube of hand cream.
To decorate, I stamped the Thank You from the A Big Thank You stamp set in Pool Party ink onto Whisper White card and cut it with the 1″ circle punch. I also used the 1-1/8″ scallop circle punch on Pool Party card and glued the 2 together and then onto the front of the box. I added a bow of Whisper White crinkled seam binding ribbon with a mini glue dot and some gems from the Holiday Rhinestones pack…

I used Petal Pink card and ink for the other two…
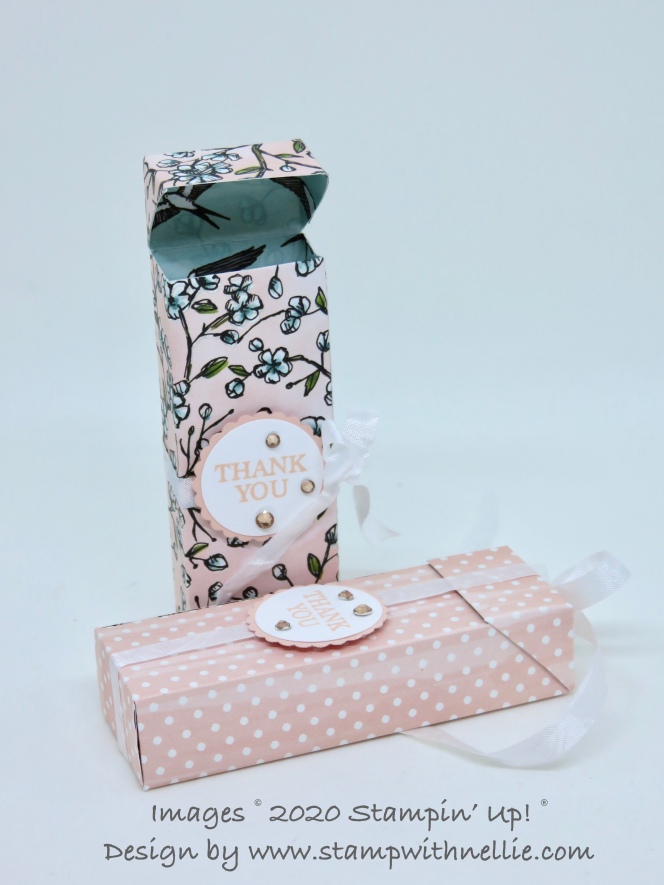
I wound the ribbon around the box, one horizontally and the other vertically and popped the sentiment up with Stampin’ Dimensionals. Finally I added Champagne Rhinestones.
I hope you’ve enjoyed today’s project and will take a look at Sally’s version too.
I’ve listed the products I’ve used below and you can click on any of the links to visit my online Stampin’ Up! shop to start shopping.
Let me know if you have any questions, I’d love to help.
Happy crafting,
Heather x
Product List  |  | |
 | ||
 |  Circle Punch") | |
 |


 Scallop Circle Punch")
 Crinkled Seam Binding Ribbon")


love the box but hard to follow. do you have a video
If you click the link to Sally’s post she had a video that may help
These are adorable Heather, they’re now added to my ‘must try this’ list. Xx
Thank you Anne-Marie, have fun xx