Hello and thank you for joining me.
Today’s project is a little series of firsts for me. I haven’t used White Vellum card much and I’ve never made a box from it or heat embossed it until now…

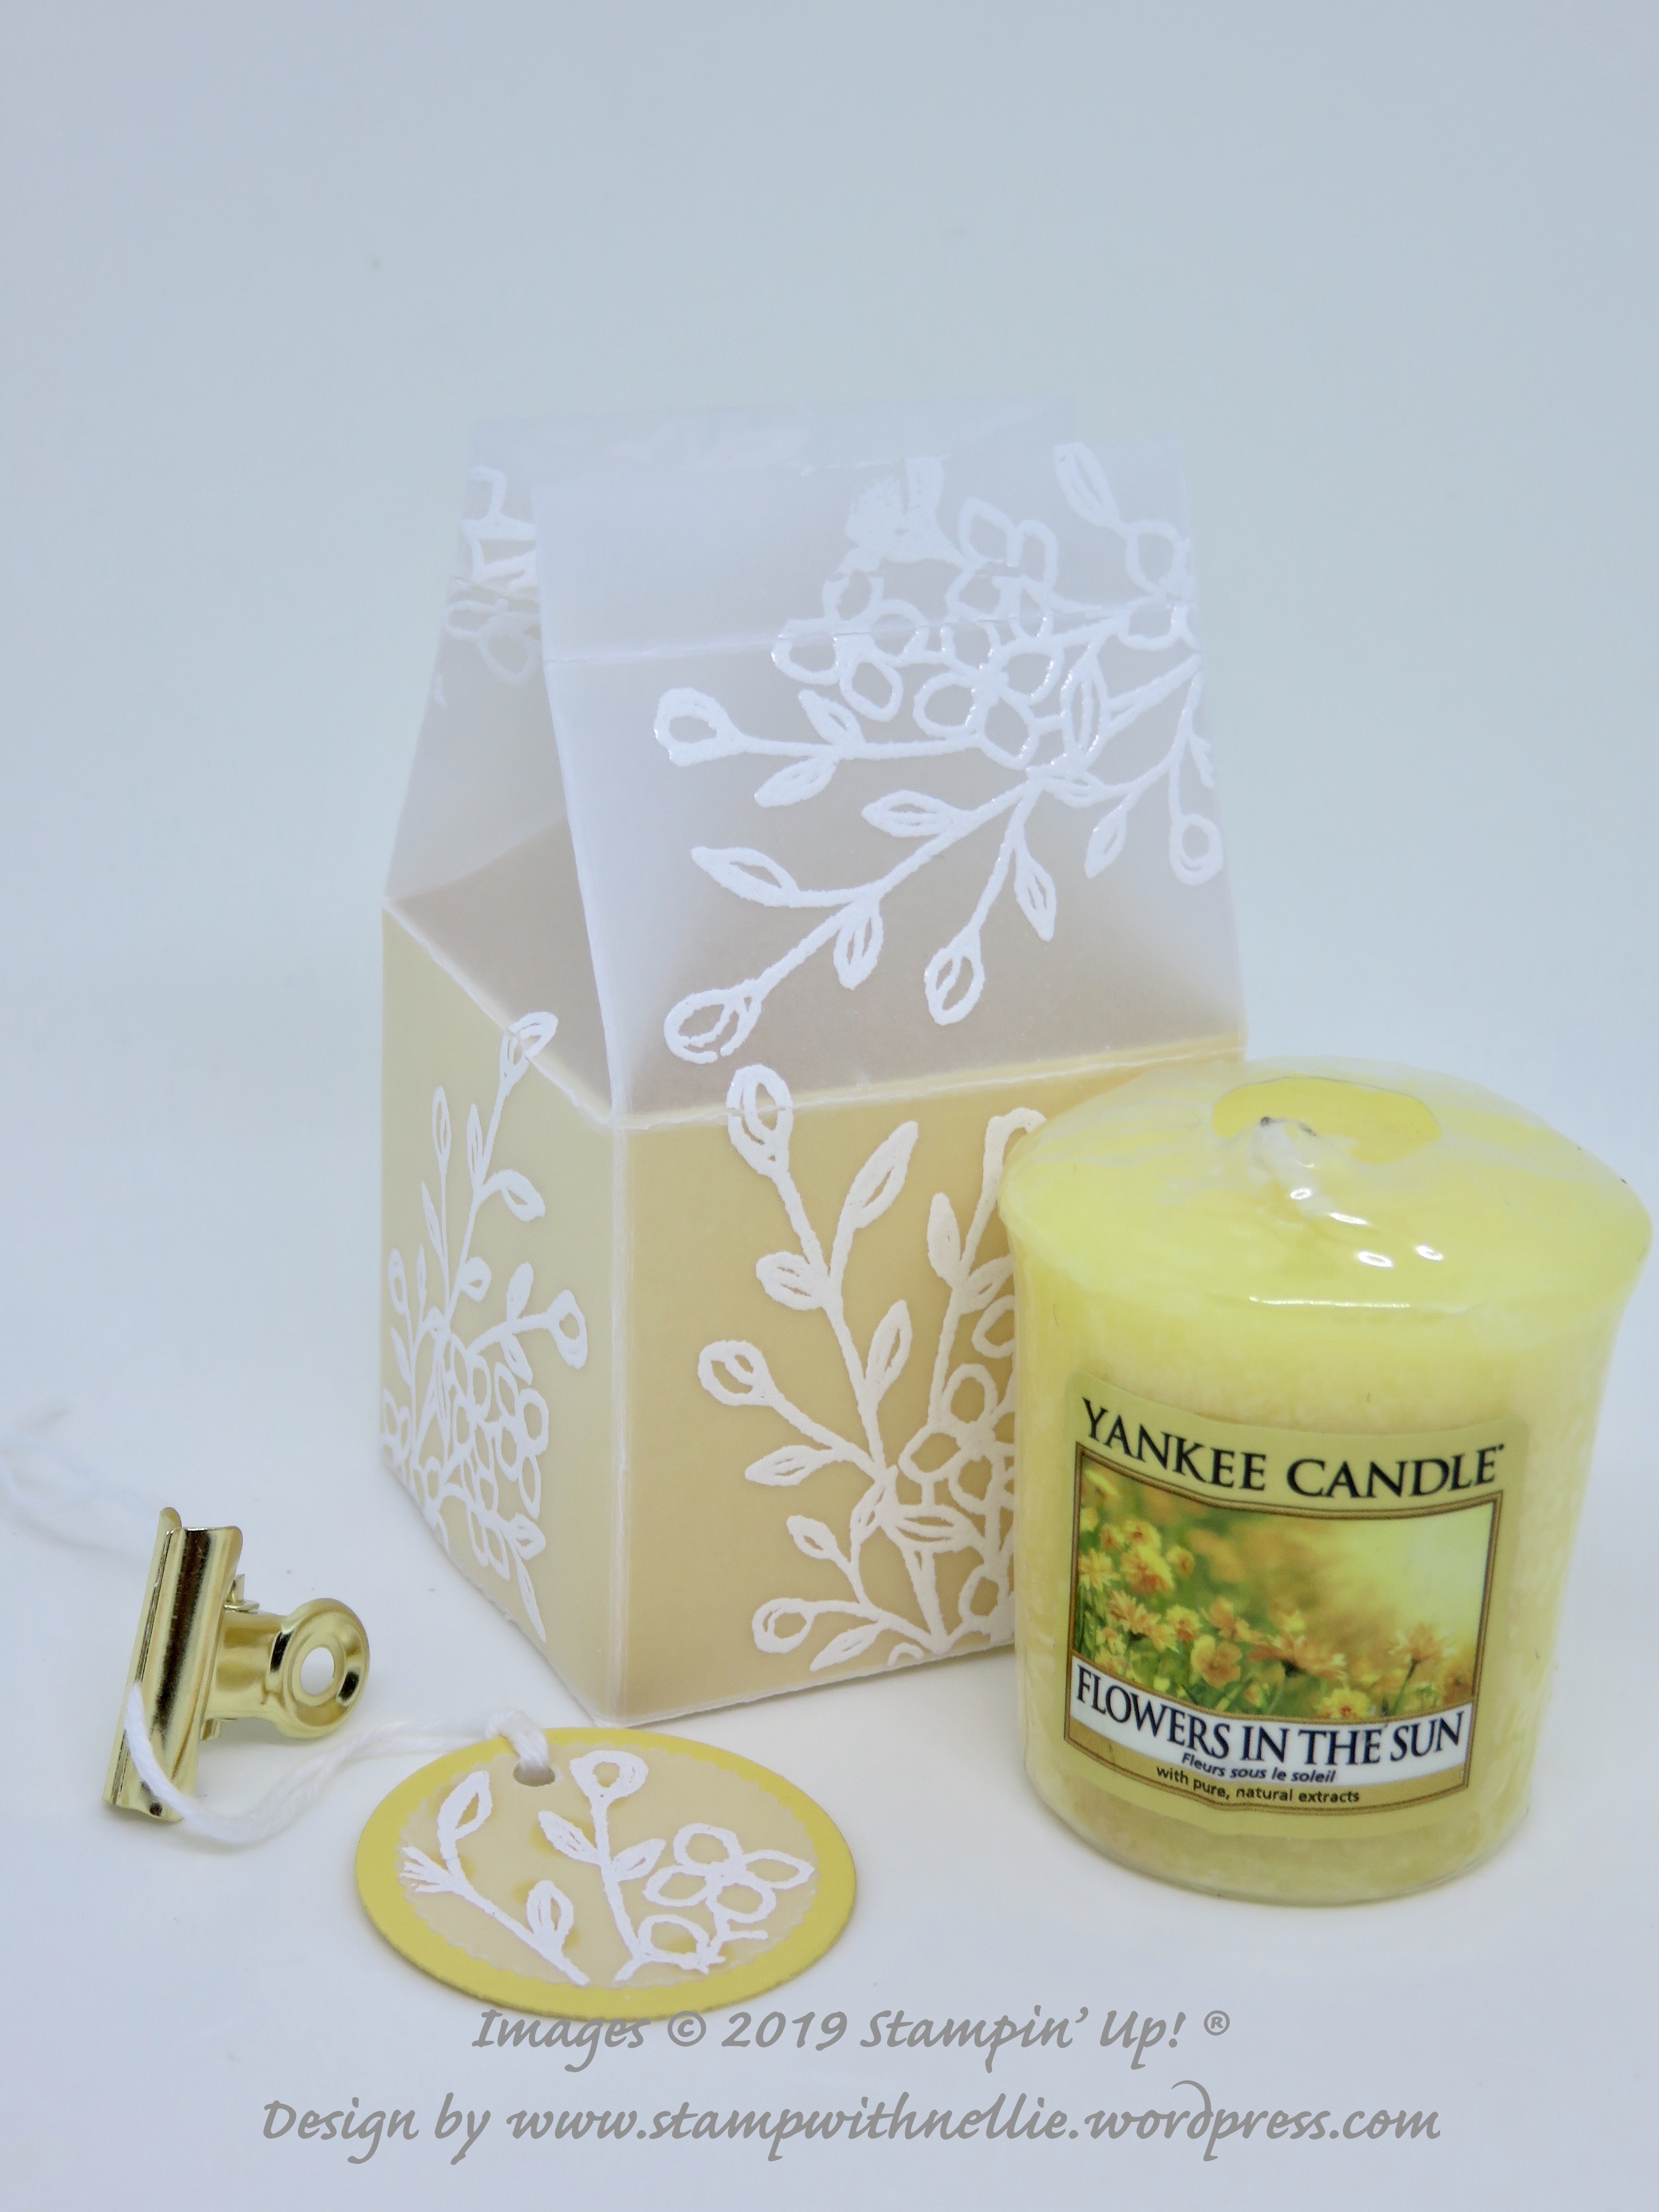
To keep myself in some familiar territory I used one of my long-time favourite stamp sets, Touches of Texture, and my favourite box style, the milk carton.
I used a piece of White Vellum card that measures 8 & 1/4 inches by 5 & 3/4 inches. On the long side I used my trimmer to gently score at 2, 4, 6 and 8 inches. On the short side I scored at 2, 4 and 5 & 1/4 inches. Back on the long side I made marks on the top score line at 3 & 7 inches and used these to add in diagonal score lines to the second horizontal score line. This helps the sides of the box to fold in neatly.
As I was concerned about cracking the vellum I didn’t burnish the score lines with a bone folder but instead I gently folded the score lines and just pressed them with my fingertips.
I used the floral sprig from Touches of Texture (part 2) to stamp the 4 sides and front and back top panels with Versamark ink and added White Stampin’ Emboss Powder. I brought my heat tool up to temperature and then gently melted the embossing powder with it. I was surprised at how easy this was and the vellum didn’t warp – phew!
I knew I wanted to add a votive candle inside and I didn’t want it to be too obvious so I added some coordinating card to the inside of my box. This isn’t glued in and just adds a little colour and screens the candle. I used Daffodil Delight and cut it to 8 & 1/4 inches by 1 & 7/8th inches. I scored the long side at 2, 4, 6 & 8 inches.
I added my candle and all I needed then was a little tag. I stamped a scrap of vellum they same way as the box and cut it with a small scalloped circle layering thinlit die. I added this to a slightly larger Daffodil Delight circle and then punched both with my 1/8th inch punch so that I could thread some Whisper White Bakers Twine through it. The box is kept closed, with the tag in place, with a Gold Library Clip
I’m glad I challenged myself to be brave enough to do this, lol. I think it worked out quite well.
I’ve listed the products I used in this project below. You can click on any of them to visit my online Stampin’ Up! shop at any time. I would of course be honoured to be your independent Stampin’ Up! demonstrator.
Use the comments or Contact Me form if you have any questions on this project or any Stampin’ Up! product.
Happy crafting,
Heather x
Product List  |  | |
 |  |  Gold Binder Clips [141673] £6.50 |
 |  |  |
 |

Love this Heather ,looks delicate.x
This is Lovely! A good idea for that small gift!
Thank you! I love giving little surprises almost as much as receiving them xx
This is so pretty – i love it x
Thank you Janice xx