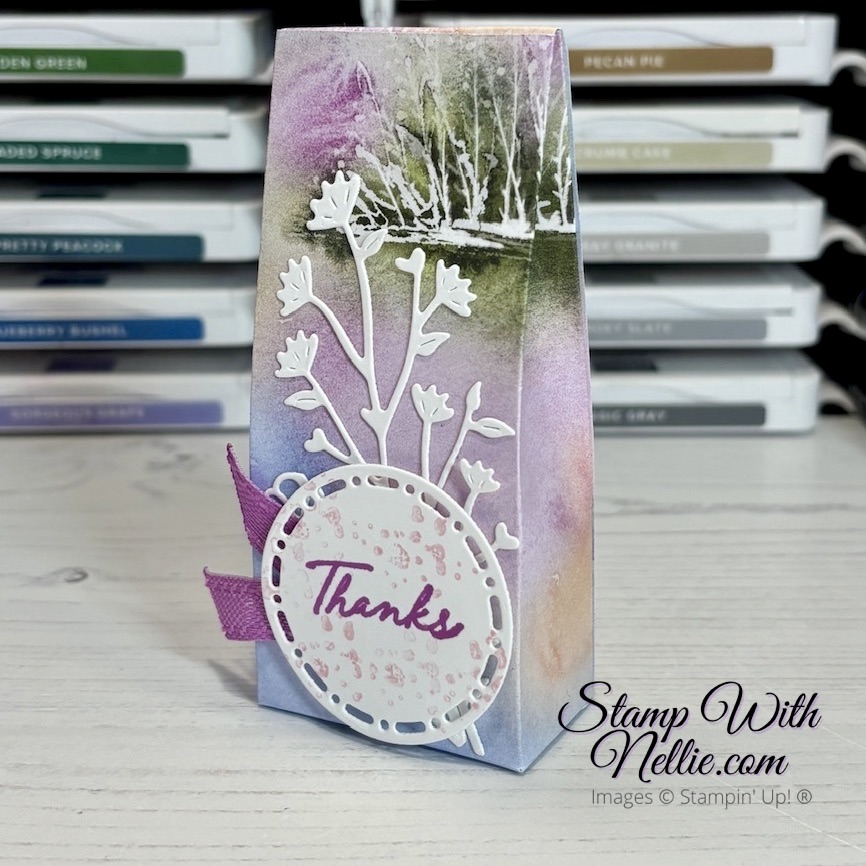
Hello! I hope you are well. Yesterday I shared a card I made in a Facebook Live crafting session recently. So, today I want to show you the Thoughtful Journey tiny gift bag that also featured in the session…
You can check the Facebook Live playback by CLICKING HERE
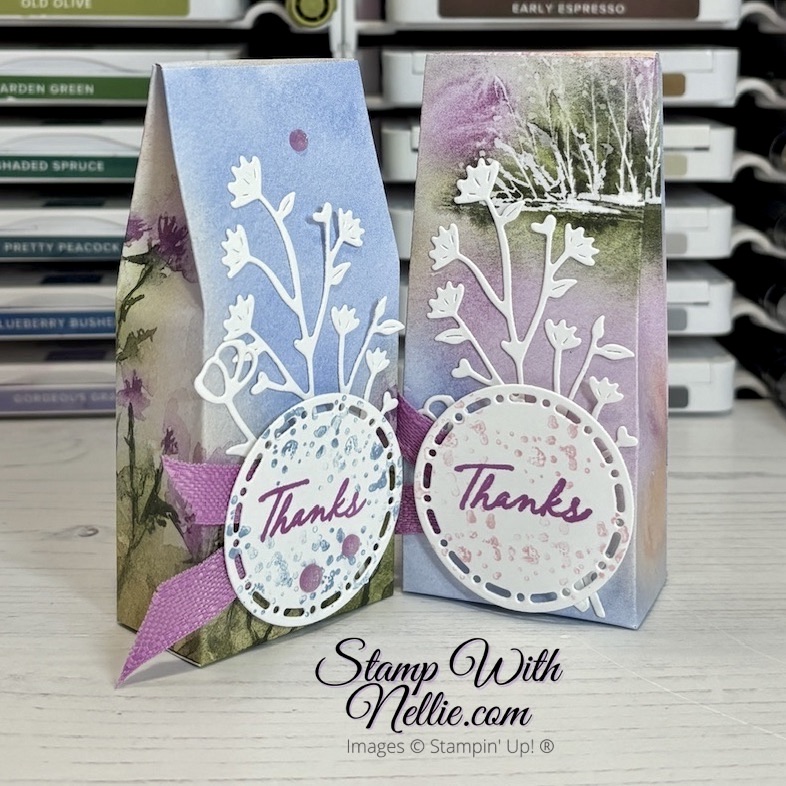
During the session I shared the absolutely stunning Thoughtful Journey designer series paper pack. The sheets in this pack are 6″ x 6″ so I used a whole sheet to make my pretty little gift bag.
Here’s the one I made in the live event alongside my original…
I love that the closure for these little bags means that you don’t need to add a ribbon or a clip to keep it closed. The flap at the top of the bag simply tucks into the top of the bag and keeps your goodies safely inside!
The decorations I added were created with the Thoughtful Wishes dies. The sentiment is from the Thoughtful Wishes stamp set and I used Petunia Pop ink for both of them. I used one of the many circular dies from Spotlight On Nature to cut the sentiment piece and stamped over it with the little splatter stamp, also from Thoughtful Wishes.
A little bit of ribbon and some gems and the Thoughtful Journey tiny gift bags were complete.
MEASUREMENTS
To make the Thoughtful Journey tiny gift bag I made in the Facebook Live crafting event you’ll need the following supplies:
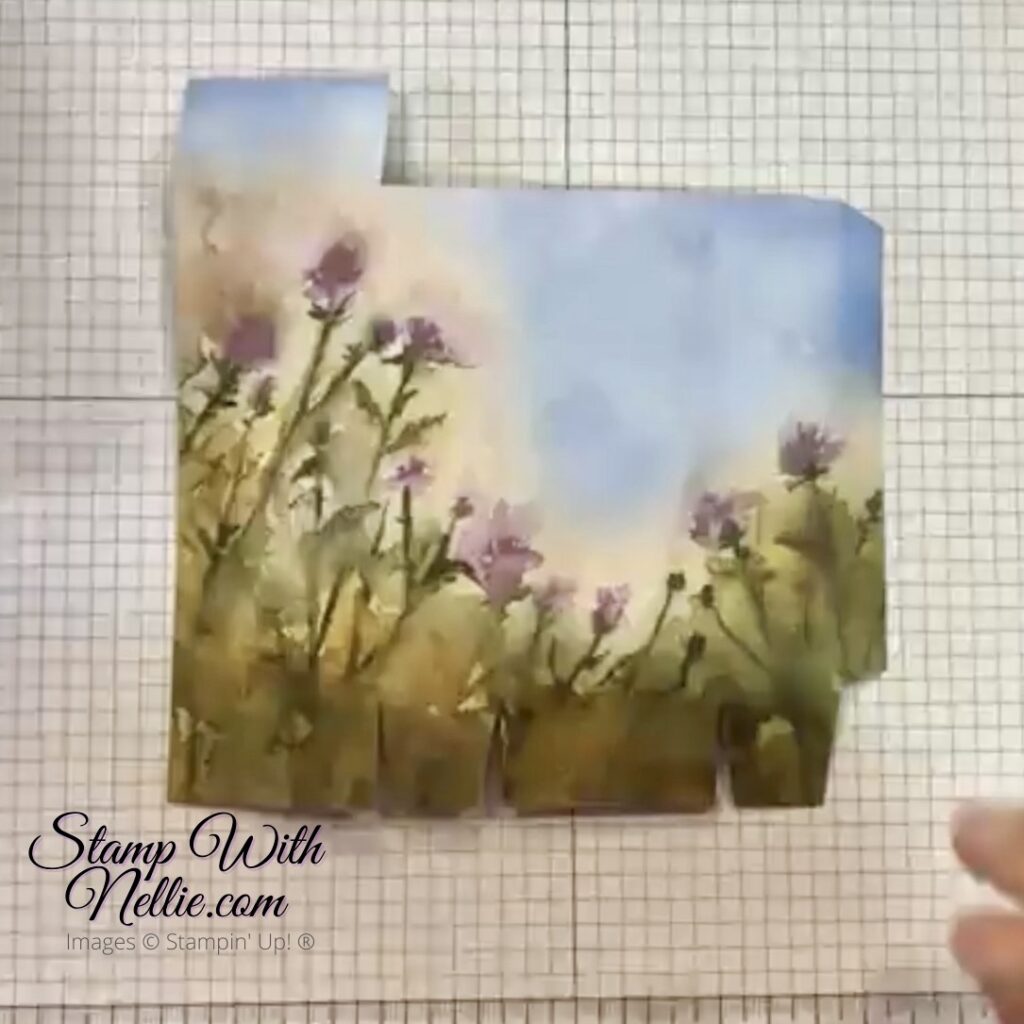
- One 6″ x 6″ sheet of Thoughtful Journey designer series paper
- score the vertical pattern direction at 1-3/4″, 2-3/4″, 4-1/2″ and 5-1/2″
- score the horizontal pattern direction at 1″ and 5″
- cut up the vertical score lines at the bottom to form the pieces for the base
- cut along the top horizontal score line from the right edge to the first vertical score line
- see photo below (sorry it’s a screen grab from the video so not the best quality!)
- Basic White card for the die cut pieces and sentiment circle
- ribbon
- embellishmets
I hope you like these Thoughtful Journey tiny gift bags as much as I enjoyed making them.
shop the products
I’ve listed the products I used for today’s project below. You can click on any of these links and then view that product in my online Stampin’ Up! shop.
customer appreciation
When you shop with me you’ll receive a handmade card and gift as a token of my appreciation. If your order is under £150 please use the current Host Code. This then means that I can add in a free product to your customer thank you pack for the month. Find out more on the Host Code page in the main menu.
Happy crafting,
Heather x

so pretty!
Thank you Deborah, the paper pack is gorgeous!! ❤️❤️