Hello! I hope you are well. We had a fun evening with our in person class a few days ago. My Stampin’ Up! team leader Valerie Broomfield showed us all how to make a split front design card. I didn’t have the chance to make one in the class but I have now. Here’s my Flight & Airy split front card…
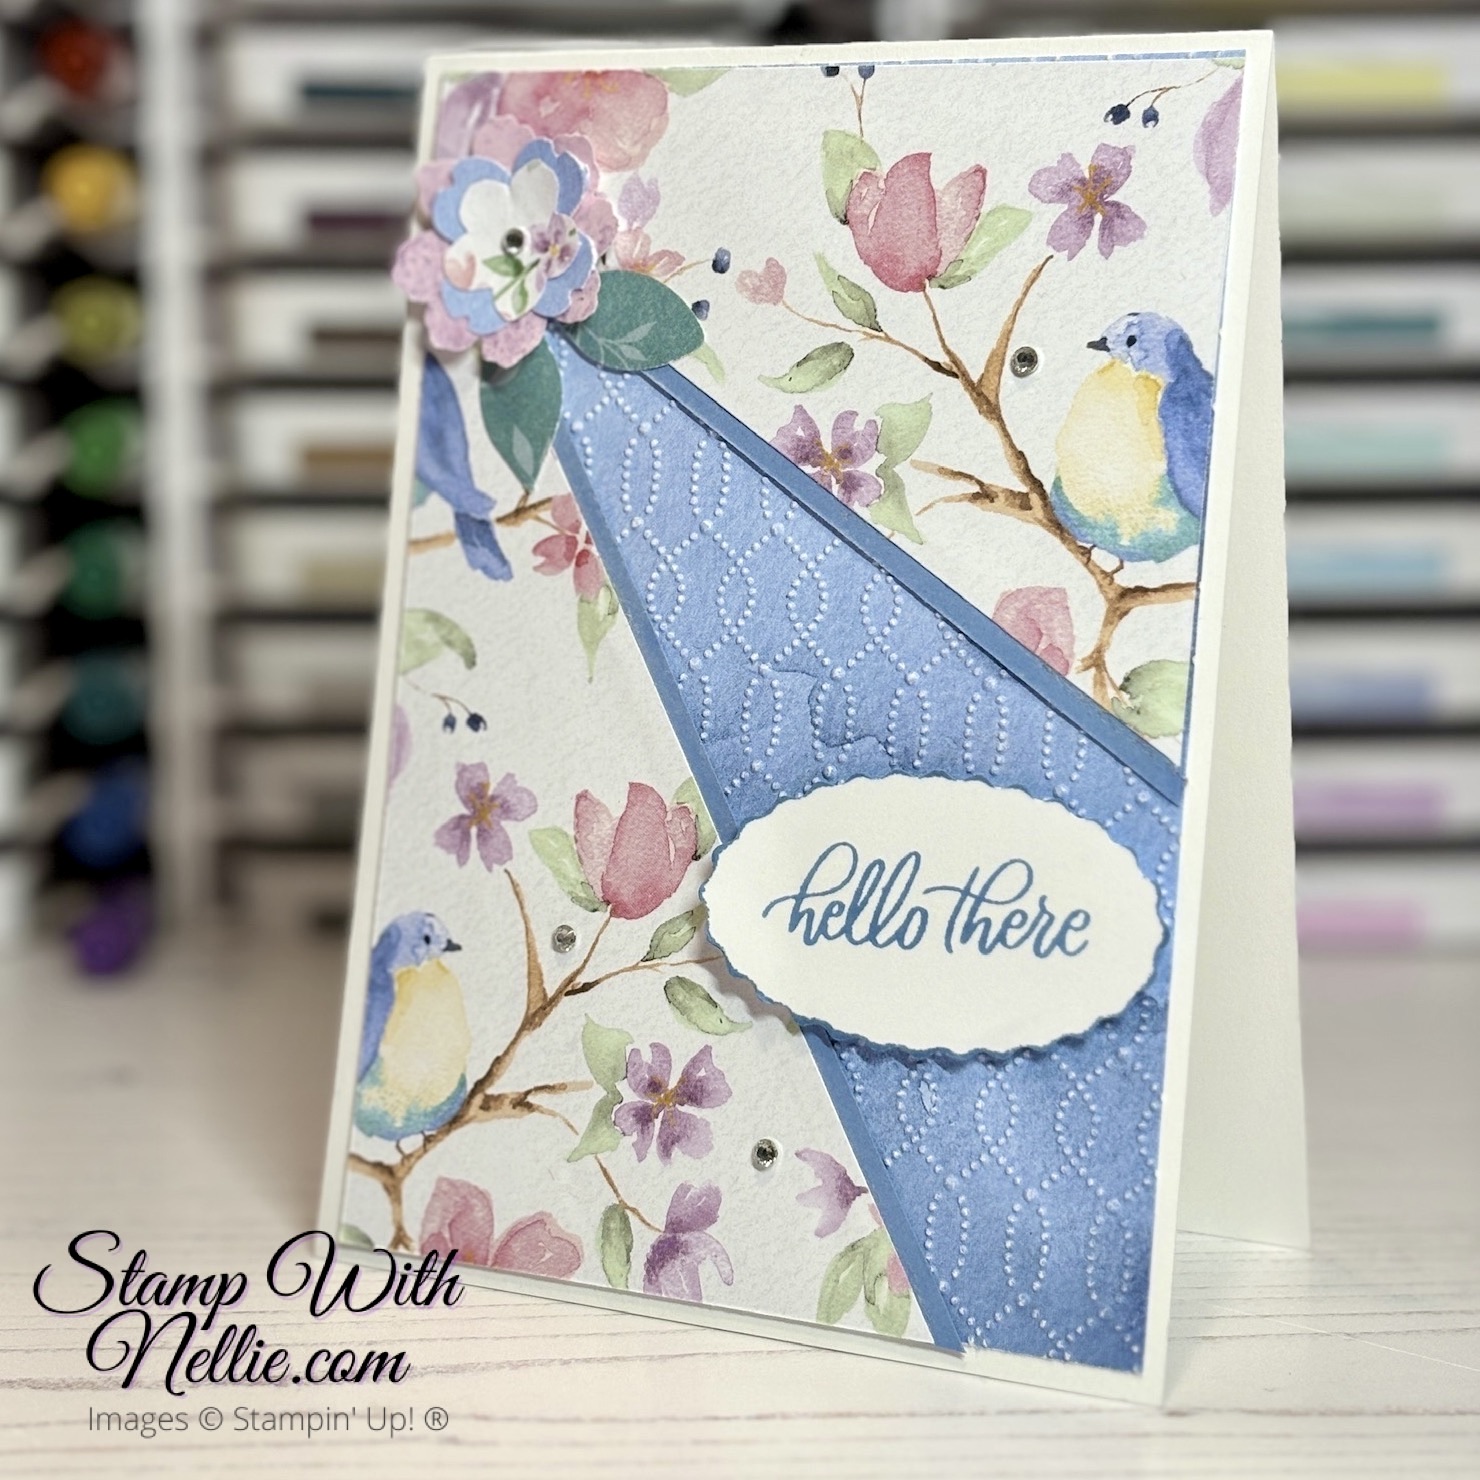
This particular design shows both sides of one of the pages in the Flight & Airy designer series paper pack. This paper pack is only available for a few more days. It’s one of the Sale-A-Bration free products you can select with a qualifying spend up to 29 February 2024. Time is running out to take advantage of this awesome promotion. The next one will be next year!
I’ve made a video to show you the elements of this card and how to put them together. This will hopefully help our team members and customers that have received one of Valerie’s card packs in the mail…
youtube tutorial
I’d love you to click on the image above or if you prefer you can click here to pop over to YouTube and see my Flight & Airy split front card. If you enjoy watching my video, I’d love you to give it a thumbs up and leave me a comment too. If you haven’t already subscribed to my channel, make sure you do so when you’re there; so you don’t miss out on future videos.
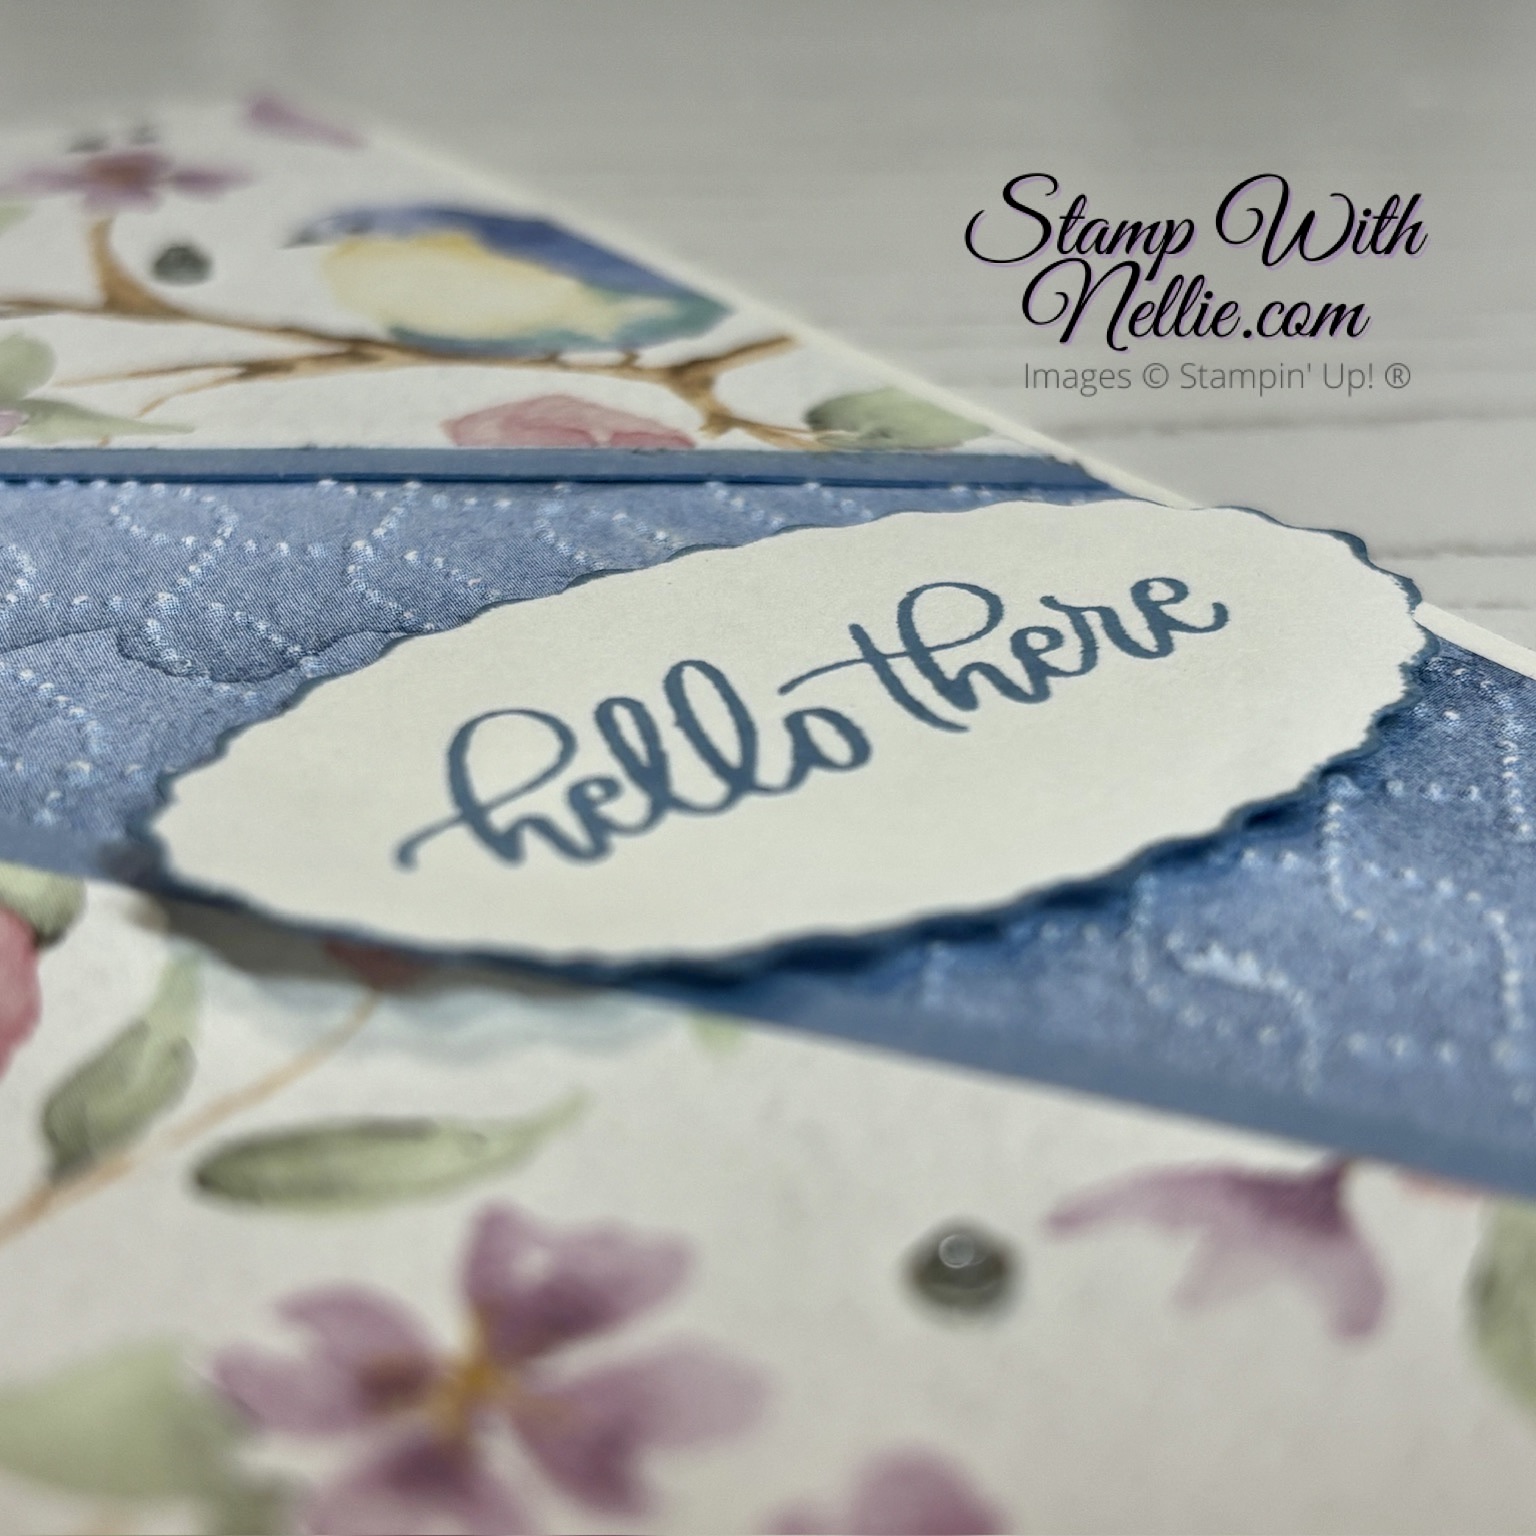
I also used the Sale-A-Bration Softly Sophisticated bundle for the card. This close up shows you the texture added to the DSP by the embossing folder….
I hope you like this style of card and will give them a try too.
MEASUREMENTS
To make the project I made in today’s video you’ll need the following supplies:
- Basic White Thick card for the base measuring 4-1/8″ x 11-1/2″
- score on the long side at 5-3/4″
- 2 pieces of Flight & Airy designer series paper measuring 3-7/8″ x 5-1/2″
- mark ONE piece at the following points
- 1/2″ from the top left corner
- 3″ from the top right corner
- 3″ from the bottom left corner
- cut on the diagonal lines as shown in the video
- mark ONE piece at the following points
- 2 strips of Boho Blue card that are 1/4″ wide
- Basic White card for the sentiment
- scraps of Flight & Airy DSP to punch with the Petal Park builder punch
- embellishments
SHOP THE PRODUCTS
I’ve listed the products I used for today’s project below. You can click on any of the links in the Product List to visit that item in my online Stampin’ Up! store. Please remember that you can’t buy the Sale-A-Bration products. Instead, you need to earn them for FREE with qualifying orders up to 29 February 2024.
CUSTOMER APPRECIATION
When you shop with me you’ll receive a handmade card and gift as a token of my appreciation. If your order is under £150 please use the current Host Code. This means that I can add in a free product to your customer thank you pack for the month. Find out more on the Host Code page in the main menu.
Happy crafting,
Heather x
Product List")
 Designer Series Paper")


another beauty!
Thank you so much ❤️
Thanks Heather this looks fantastic. I will watch your YouTube later today on how you created it. Xxx
Thank you so much Val❤️
Another fabulous creation, I can’t wait for mine to arrive xx
Thank you Hazel, hopefully it will arrive very soon ❤️