Hello everyone, I hope you are well.
Today I want to show you a couple of the new Mini Paper Pumpkin boxes that I’ve decorated recently.
My friend’s grandson Declan has just celebrated his birthday in lockdown and so I transformed one of the white boxes into this little treasure box for him…


The Mini Paper Pumpkin boxes come in a pack of 10 and the each measure 5-7/8″ x 3-3/4″ x 1″ (or 14.9cm x 9.5cm x 2.5cm). They arrive flat ready for you to assemble. Before I did that for Declan’s box I distressed the edges with a mix of Crumb Cake, Soft Suede and Early Espresso inks and added pieces of the wood effect paper from the In Good Taste designer series paper pack to the top, bottom and sides that are on show when the box is closed.
I used the new Playful Alphabet dies to cut Soft Suede card and the new Foam Adhesive sheets to add his name to the top of the box. I did think about using my Soft Suede marker to colour the foam adhesive that you can see, but I decided to leave it white so the letters stand out a bit more.
I put some money (or treasure?!) in the bottom of the box and covered it with sweeties and chocolate bars.
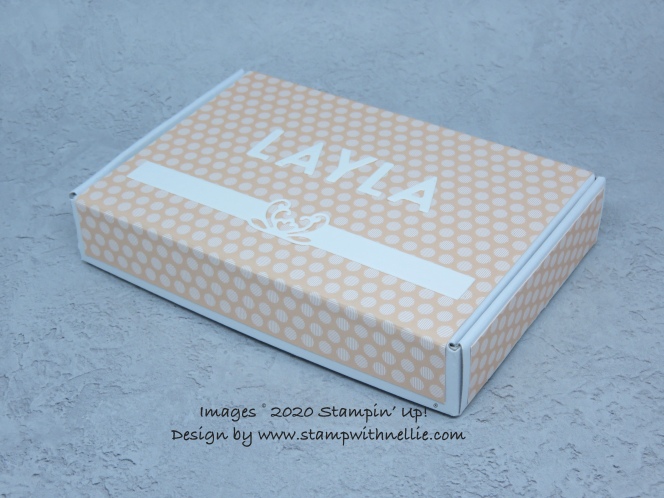
Now Declan has a little sister and I didn’t want her to feel too left out so she got her own box with sweeties too…

This one was easier to make as I left the box white and simply added some Petal Pink designer series paper from the front side panel, over the top and down the back panel and then added strips to the 2 remaining sides.
I used the Playful Alphabet dies on Whisper White card and just glued them onto the top of the box. For an extra flourish I also used one of the Detailed Bands dies to cut another piece of Whisper White card and added that under the name. Simple but pretty too.
I think I’m going to have lots of fun with these ready to assemble boxes! And with the Playful Alphabet dies, they are such a lovely size to add initials or names to almost anything.
I’ve listed the products I used for today’s projects below. You can click on any of the links to start your online Stampin’ Up! shopping with me.
Happy crafting,
Heather x
Product List


[…] blog for this box and the link to my video tutorial Click here to see the blog post for this card Click here to read the blog post for this decorated mini Paper Pumpkin box Click here to read the blog for this card and the one below Click here to read the blog for this […]