Hello everyone.
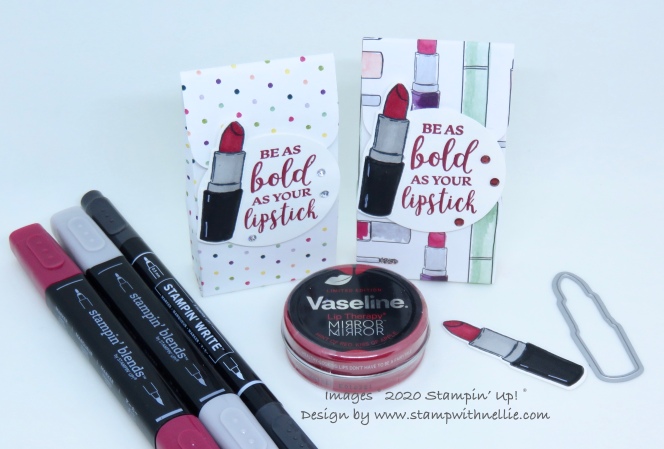
Today’s project is another little item that might be nice to hand out to the important ladies in your life, as a motivational gift. I love the ‘Be as bold as your lipstick’ sentiment from the Dressed To Impress stamp set…

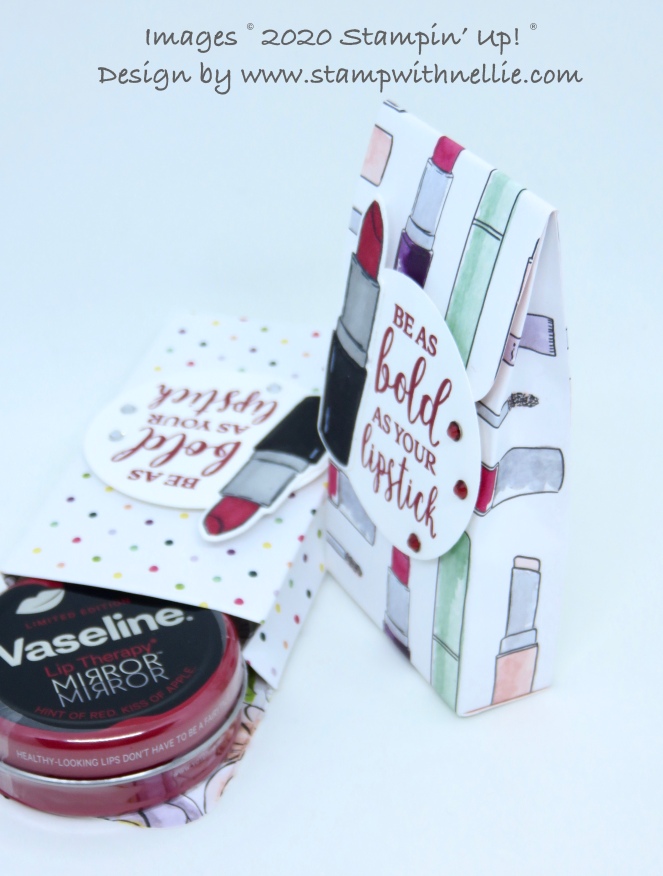
I made these little gift bags to hold a Vaseline lip balm tin but you could pop other little items inside instead.
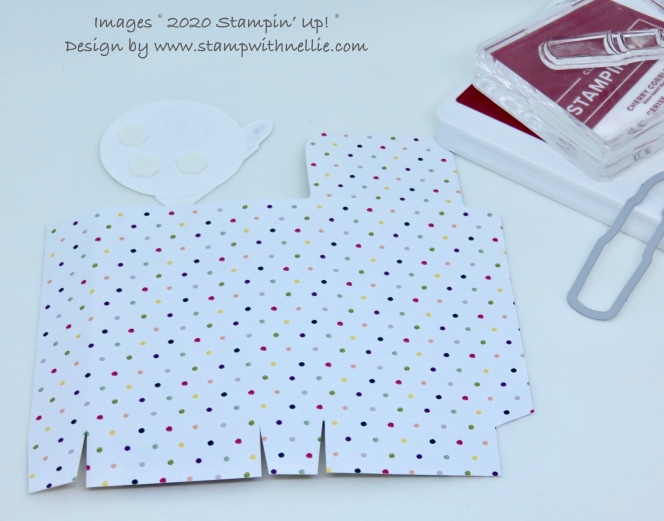
For each one I used a piece of the Dressed To Impress designer series paper that measures 6″ x 6″, on the first side score at 3/4″, 2-3/4″, 3-1/2″ and 5-1/2″. Turn 90 degrees and score at 3/4″ and 4-1/12″.
Here’s your cutting guide…

On the skinny panel cut out the top and bottom rectangles to make your side tab. Cut up all the score lines at the bottom and wedge the squares. Leave the piece next to your side tab but remove the rest of the top sections. I rounded the corners on the remaining top panel.
Add glue to the side tab and adhere to the back of the first panel to form the box shape. Glue the bottom tabs together (fold in the sides first, the back and then the front for the neatest look), I simply squeezed the front and bag together to crease the sides so they fold in when you close the bag.
To decorate I stamped the sentiment in Cherry Cobbler ink onto Whisper White card and cut with my 2″ circle punch. I stamped the lipstick with Memento ink and coloured with Cherry Cobbler Dark and Smoky Slate Light Stampin’ Blends and a Basic Black Stampin’ Marker. I added a couple of highlights to the black part with a white gel pen from my stash and added some Wink Of Stella on top of the Cherry Cobbler to give the lipstick some shimmer. I then cut it out with the corresponding die from the All Dressed Up dies.
I glued the lipstick to the circle and then added Stampin’ Dimensionals to the bottom of the circle only. I added this to the front of my bag so that the top flap could tuck under it, to keep the bag closed…

These were so quick and simple to make that I made quite a few for my craft fair on Saturday. Of course I had to add some rhinestones to them too! You can use your Stampin’ Blends to colour your rhinestones or pearls to match your projects.
I hope you’ve enjoyed today’s project and will pop back sometime to see more of my Stampin’ Up! creations.
I’ve listed the products I’ve used today below; you can click on the links to visit my online Stampin’ Up! shop at any time. I’d love you to shop with me.
If you buy the stamp set and the dies I used for today’s project using the bundle code shown below you will save 10% on the cost of buying them separately. I’ve shown both options in the product list. And remember, there’s still time to earn free products during Sale-A-Bration but be quick it ends on 31st March 2020.

Happy crafting,
Heather x
Product List


Leave a Reply