Hello everyone.
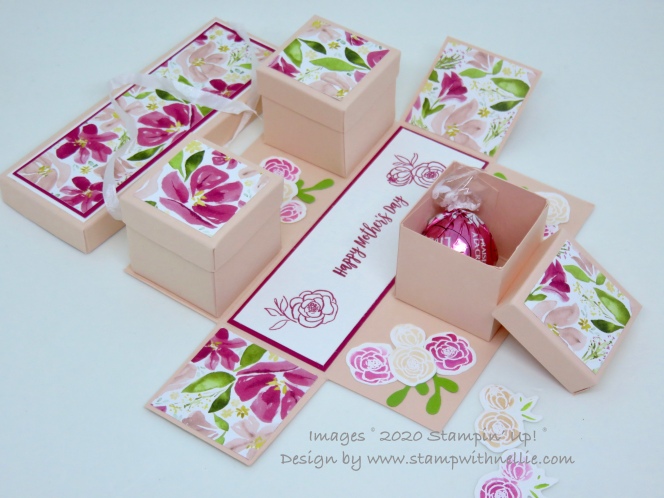
I loved taking part in the February 2020 InspireInk blog hop with this box yesterday…


The inspiration for this box with little boxes inside came from my earlier square version…

In fact the measurements for the little boxes inside is exactly the same – you can find out more about my earlier version by clicking here
For my rectangular version I used Petal Pink card and the ever so pretty Best Dressed Designer series paper (DSP). Here’s what you’ll need to make your own:
- Petal Pink card for the main box base that measures 8-1/2″ x 5-1/4” Score on the long side at 1-3/4″ and 6-3/4. Score on the short side at 1-3/4″ & 3-1/2″
- Two pieces of DSP for the outside long edges that measure 4-7/8″ x 1-5/8″
- Four pieces of DSP for the end flaps (outside and inside) that measure 1-5/8″ x 1-5/8″
- Lovely Lipstick card for the inside of the box base that measures 4-7/8″ x 1-5/8″
- Whisper White card for stamping the sentiment for the base of the box that measures 4-3/4″ x 1-1/2″
- Petal Pink card for the main box lid that measures 6-1/16″ x 2-13/16″ – scored on each side at 1/2″
- Whisper White card for the main box lid that measures 4-7/8″ x 1-5/8″
- Lovely Lipstick card for the main box lid that measures 4-3/4″ x 1-1/2″
- DSP for the main box lid that measures 4-5/8″ x 1-3/8″
- Three pieces of Petal Pink card for the smaller box bases that measure 4-1/2″ x 4-1/2″ – scored on all 4 sides at 1-1/2″
- Three pieces of Petal Pink card for the smaller box lids that each measure 2-9/16″ x 2-9/16″ – scored on all 4 sides at 1/2″
- Three pieces of DSP that each measure 1-3/8″ x 1-3/8″
- Extra Whisper White card for the flower embellishemtns
- Granny Apple Green card for the sprigs
Here’s the cutting guide for the main box base…

And for the main box lid…

The cutting guide for the smaller boxes is the same in my first version…

With the lids being made in the same way, just smaller sides
For the flowers I used the Dressed To Impress stamp set and stamped both sizes with Versamark Ink onto Whisper White card, added White Stampin’ Emboss powder and heat set it. I coloured with Petal Pink and Lovely Lipstick ink watered down with an Aquapainter. I then cut them with the corresponding All Dressed Up dies. I did trim off the leaves as they looked a bit disjointed with the white embossing on white card! So instead I cut sprigs from Granny Apple Green card and my Sprig punch; I trimmed them down to fit into the spaces between my little boxes…

I stamped the sentiment and extra flowers from the Dressed To Impress stamp set with Lovely Lipstick onto the piece of Whisper White card for the bottom of the rectangular box.
I glued the bottom of 2 of the small boxes to the outside edges of a long side of the box base and added the 3rd one to the middle of the opposite side.
I added some White Crinkle Seam ribbon once I’d assembled the whole set of boxes but this is simply for decoration as the lid is a nice fit on it’s own.
I hope you enjoyed this project. If you didn’t manage to check out all of the other fabulous 3D projects in the blog hop please click on the blue box below to see the list of blogs to visit (you’re with number 3 right now)…
I’ve listed the products I’ve used below. You can click on any of the links to visit my online Stampin’ Up! shop to purchase them. Remember for every £45 you spend before 31st March 2020 you will earn a free Sale-A-Bration product.

Happy crafting,
Heather x
Product List


Totally love this idea xx
Thank you Verity 🙂 xx
Very pretty!
Thank you 😊 x