Hello and thanks for joining me.
I’ve got a couple of other projects made with products from the Most Wonderful Time Medley to share with you today and tomorrow. Both projects would be great for dressing up your Christmas table.

These cute little boxes filled with treats would look fabulous at each person’s place, maybe instead of shop bought crackers that are full of rubbish that just ends up in the bin!
I’ve used the Clear Tiny Treat boxes and decorated them with some of the designer series paper from the Most Wonderful Time product medley, along with some other embellishments.
The designer series paper (DSP) included in the medley is 6″ x 6″ and these treat boxes are 2″ x 2″ x 2″ when assembled. So, I’ve had to use 2 sections of paper for each box.

For the fully enclosed version I cut 2 pieces of DSP to measure 2″ x 6″ and scored them on the long side at 2″ and 4″. Once you’ve assembled your acetate box (remembering to remove the protective film first!) add one piece of the DSP inside to cover the 2 sides and bottom. Add in your treats and then add the other piece of DSP to cover the front, top and back of the box.
To decorate this one I stamped the sentiment from the Itty Bitty Christmas stamp set in Versamark ink onto Whisper White card, sprinkled with Gold Stampin’ Emboss powder and heat set it. I cut it with one of the Layering Circles dies, along with a larger circle from Gold Glimmer paper.
Top Tip: punch a 1/2″ circle in the glimmer paper circle before you glue it to the box. You can then add your stamped circle to the box with a Stampin’ Dimensional in the hole you’ve punched. It will adhere better to the acetate box than the glimmer paper.
I then added a sticker from the medley to coordinate with the paper and one of the Holiday Rhinestones.
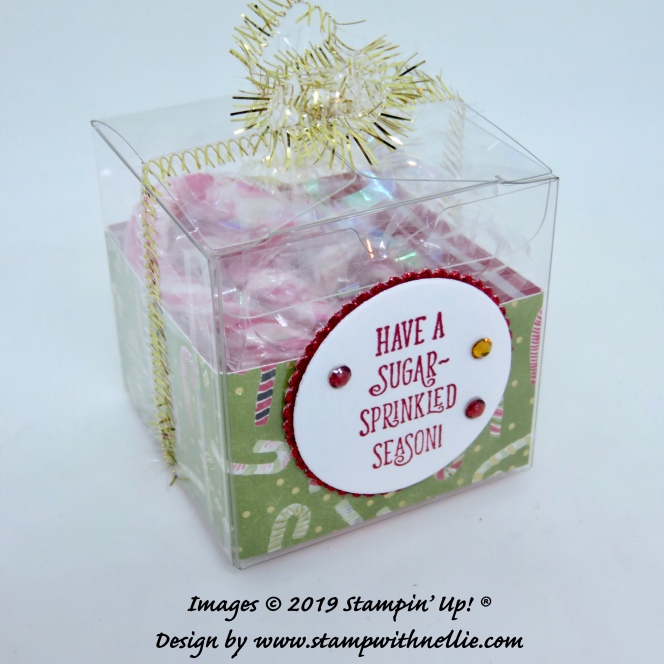
Here’s the alternative version where you can see the treats inside…

I put mini candy canes in this box so chose a design from the paper pack with candy canes on it – it’s really cute!
I cut one piece of the paper to measure 1 & 1/4 inches by 6 inches and another piece to measure 1 & 1/4 inches by 2 & 1/2 inches. Score the longer piece at 2 inches and 4 inches. Score the shorter piece at 1/4 of an inch and at 2 & 1/4 inches.
Glue the 1/4 inch tab to the back of the longer piece to join the 2 parts together. Place this inside the box and the ends will overlap with the other 1/4 inch panel tucked in behind so it covers any gap.
I stamped a different but equally apt sentiment from the Itty Bitty Christmas stamp set in Real Red ink onto Whisper White card and cute it with a Layering Circles die. I backed this one with a slightly larger circle cut from Real Red Glimmer paper. I added a few Holiday Rhinestones for that little bit of bling.
Finally I added some of the tinsel trim from the medley and tied it in a bow on top of the box.
I hope you have enjoyed today’s project and will pop back tomorrow for the final one in this mini series.
I’ve listed the products used below and you can click the links to start shopping.
Happy crafting
Heather x
Product List


Leave a Reply