Hello and thanks for joining me.
I recently bought some little note pads online that contain just 40 sheets so probably wouldn’t last me too long. I find I have to write everything down if I’ve any chance of remembering it!
I also found a pack of 8 Bic pens for £1 in a local shop so thought I should combine the two into this…

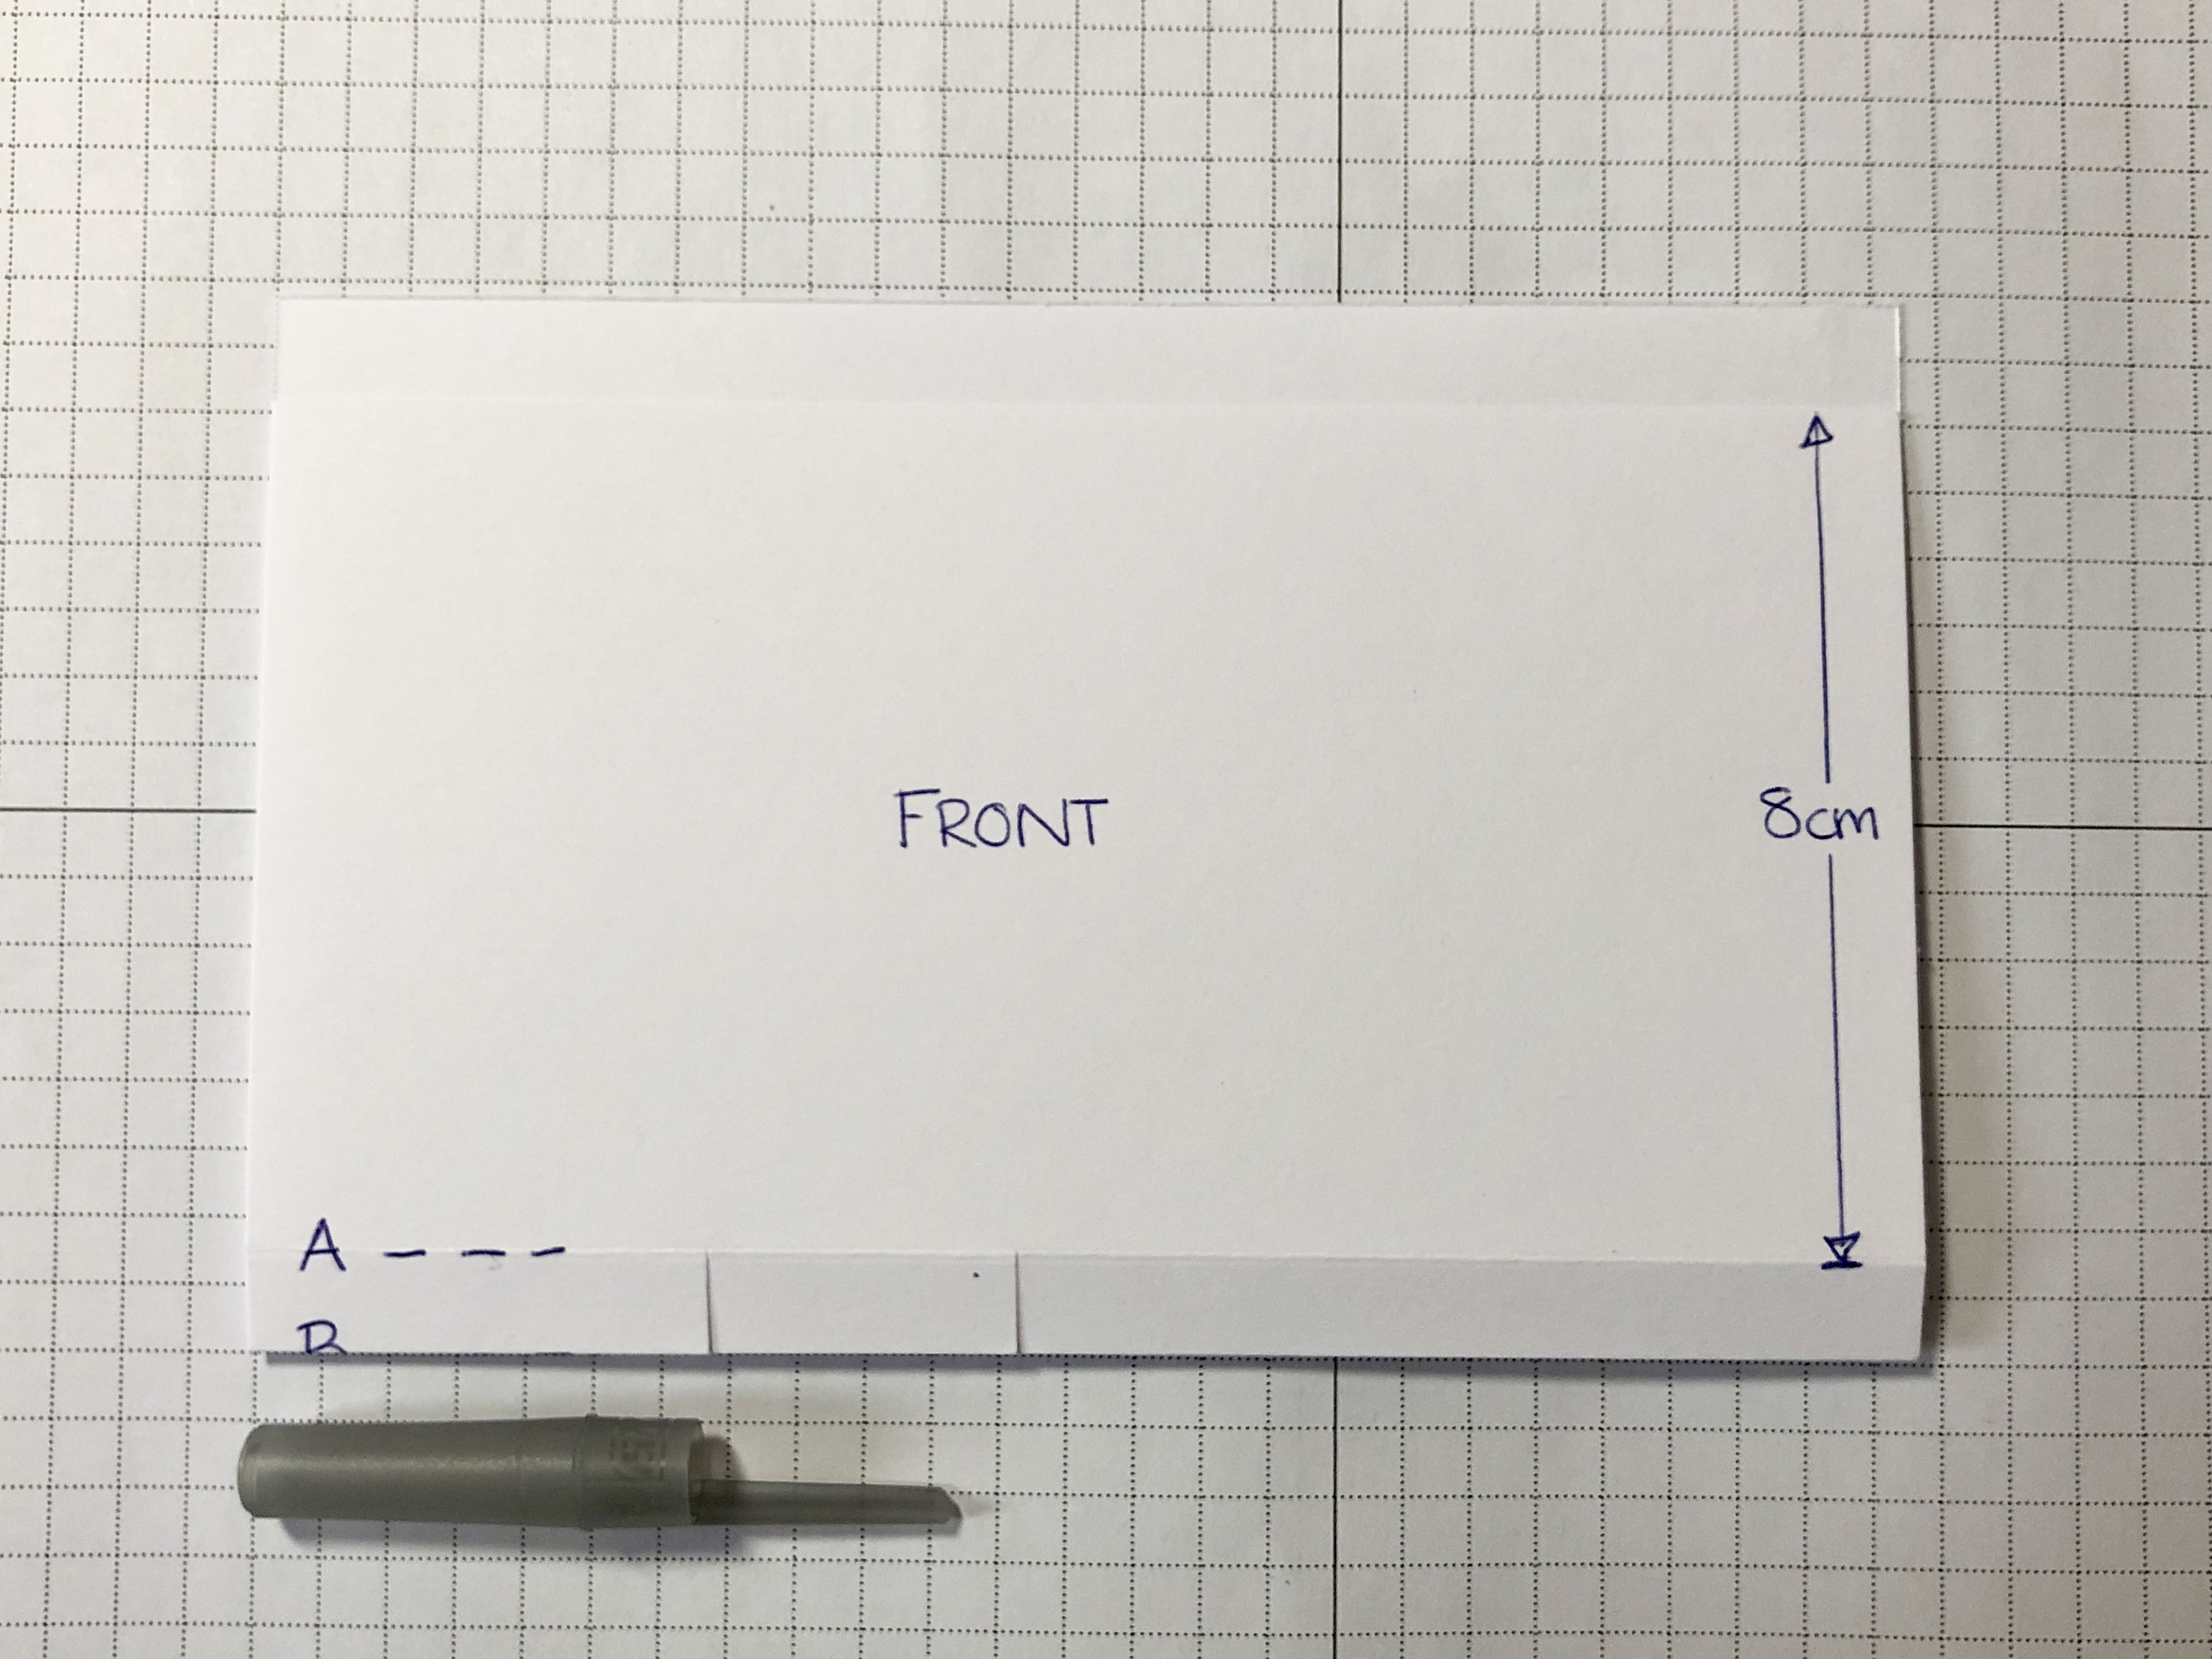
I started off with some Night of Navy card that measures 19 x 15.5 cm. I scored this on the long side at 8, 9 and 10 cm. I’ve used some cheap white card to show you how it all goes together. You’ll see from the following photograph that I’ve marked the score lines as A, B, and C and the panels Front and Back…

You need to fold the score lines in the middle to form an M shape, so do scoreline A as a mountain fold, B as a valley fold and then C as a mountain fold again. This is the way these parts will eventually be folded when the notebook cover is put together.
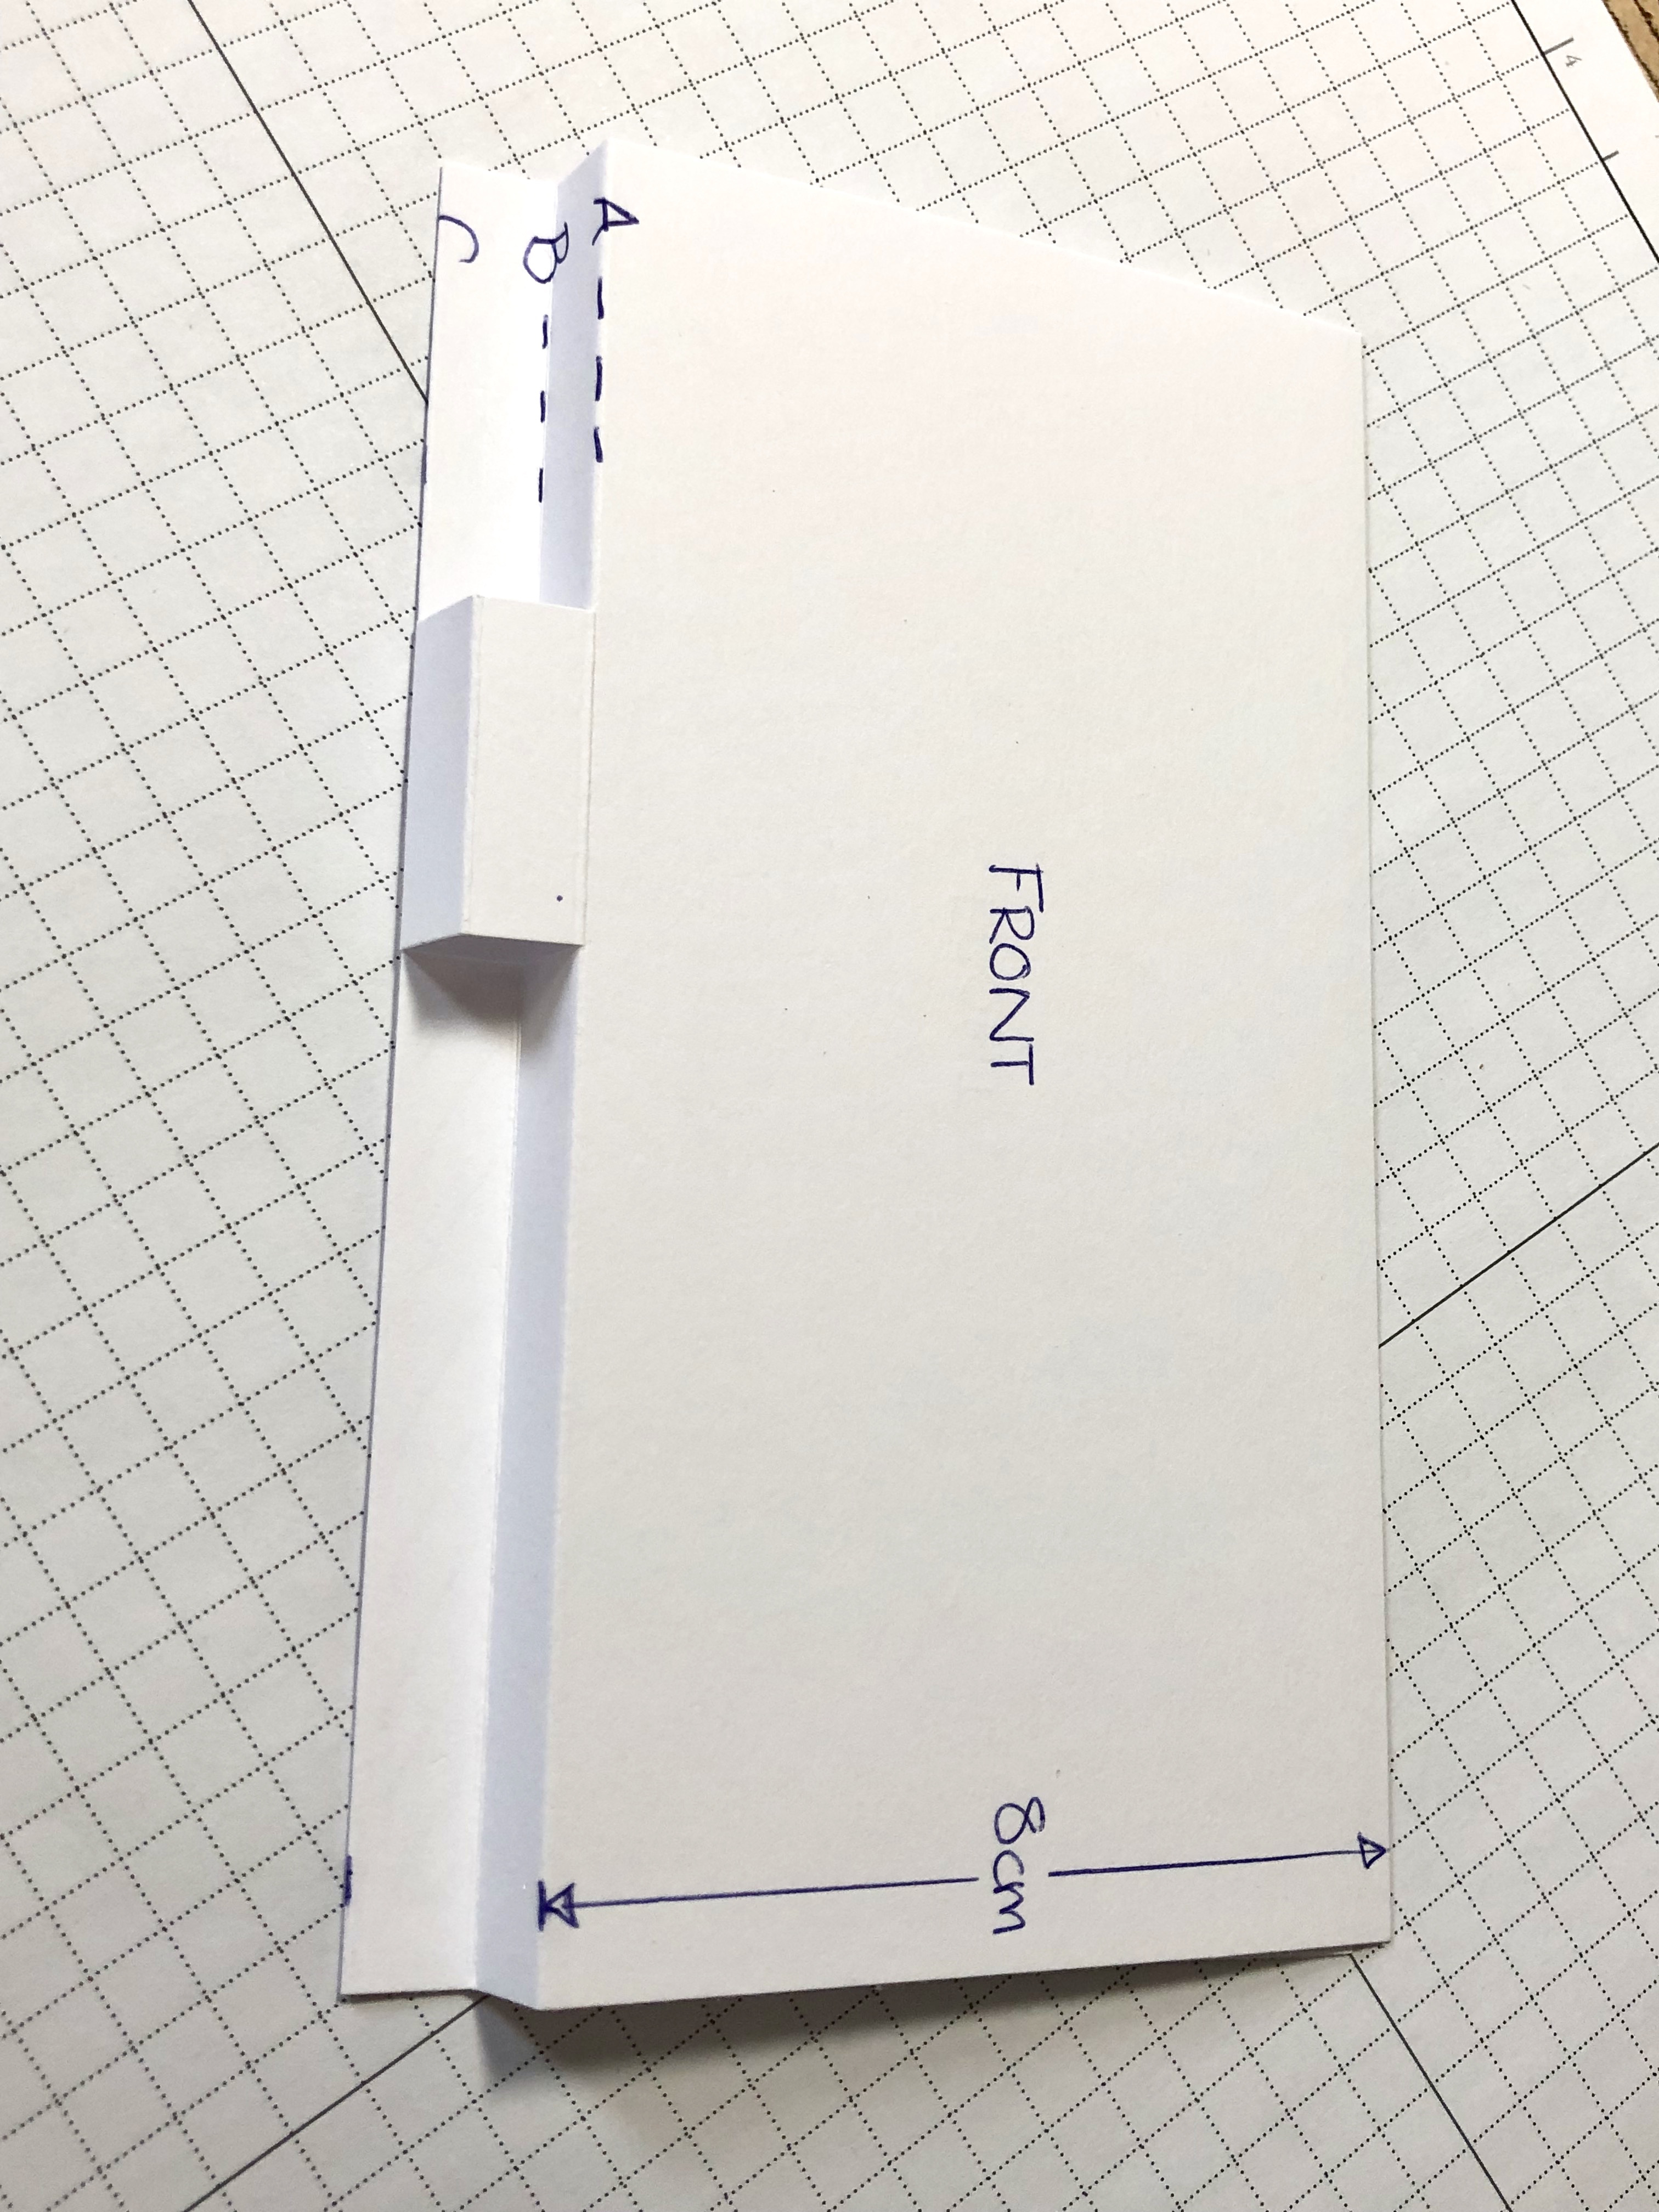
In the meantime though you need to fold along scoreline B as shown below…
Then cut 2 lines in Panel B up to the next score line to make the pen holder. TIP – measure your pen cap so that the clip goes over the holder you’re creating and the top doesn’t stick out the top too far. The width between the 2 cuts is totally up to you.
Fold the score lines back to form the M shape again.
Once you’ve cut your holder you need to add glue to the shaded parts shown below and stick them to the base. This means your pen holder isn’t glued down and pops out.

EDITED TO ADD IMPERIAL MEASUREMENTS FOR COVER:
cut your card to 7 & 1/2 inches by 6 &1/8 inches and score on the long side at 3 & 1/8, 3 & 1/2 then 3 & 7/8 inches.
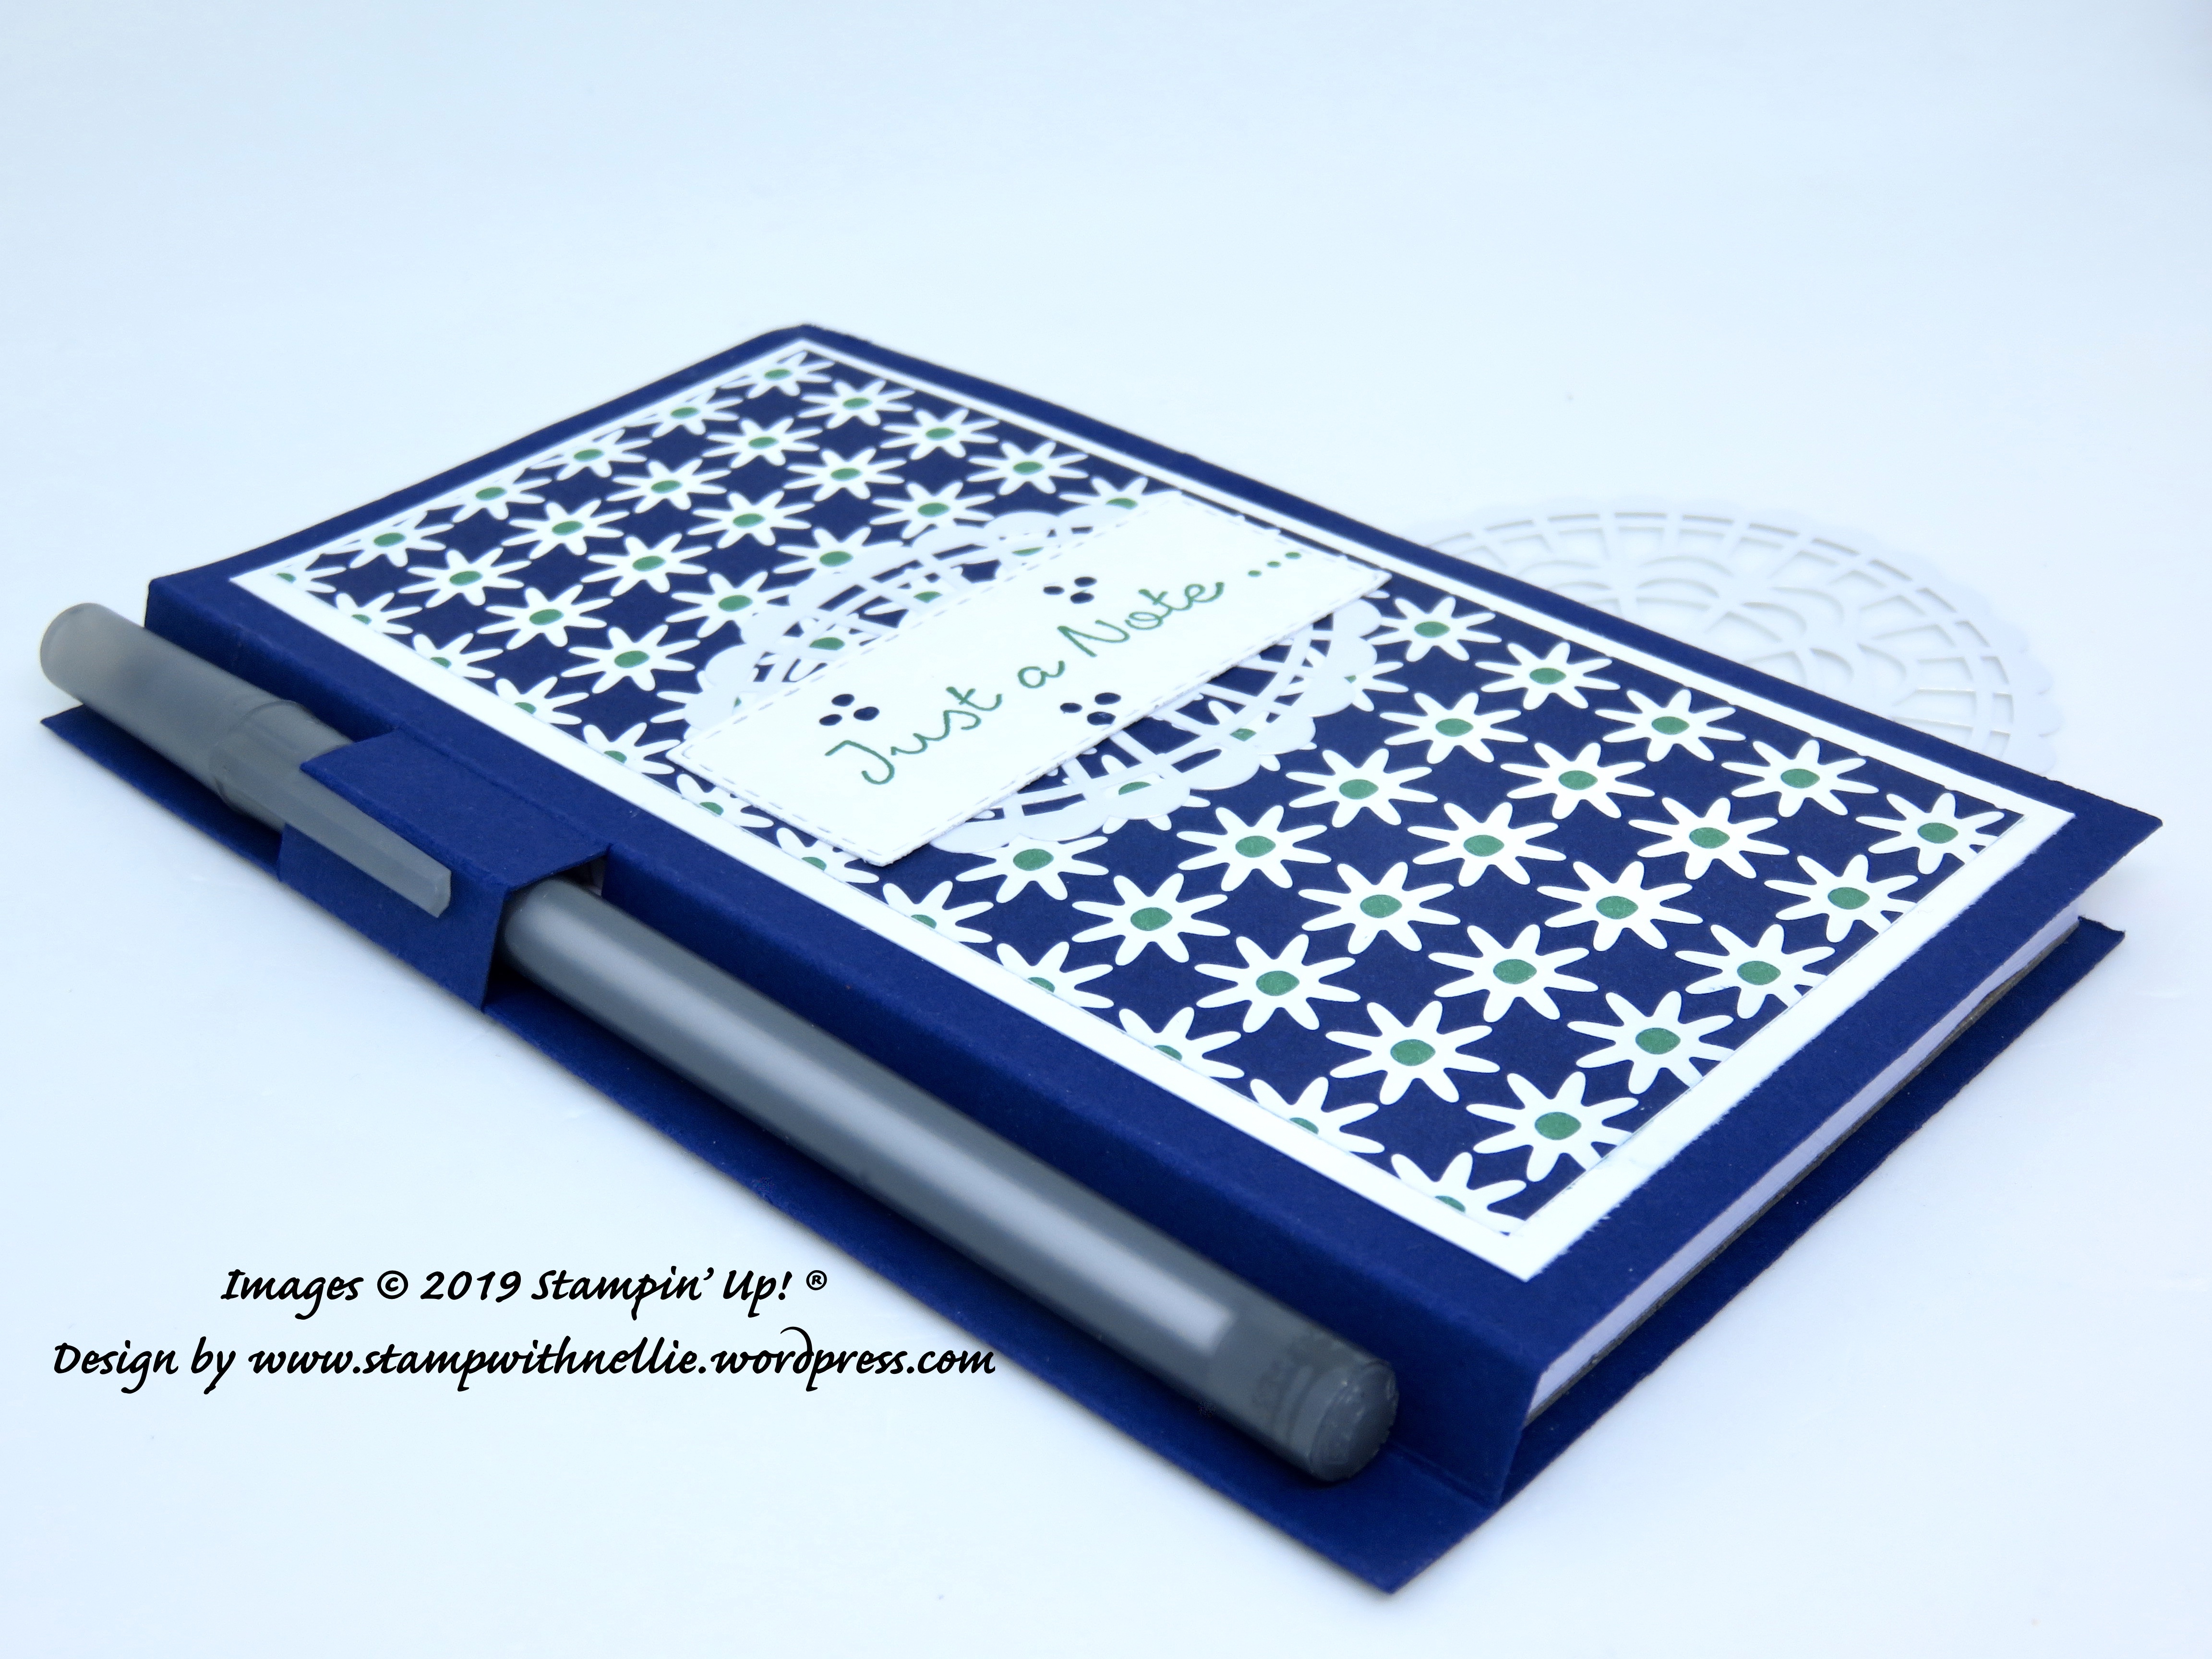
That’s the construction done, so now it’s time to decorate. I added panels of Whisper White card and Happiness Blooms designer series paper as follows:
- Front card = 7 x 14.5 cm
- Front DSP = 6.5 x 14 cm
- Back card = 8 x 14.5 cm
- Back DSP = 7.5 x 14 cm
I then stamped the Just A Note from Better Together stamp set in Call Me Clover ink onto Whisper White card and used a Rectangle Stitched Framelit die to cut it. I added some of the little dots from the Bloom By Bloom stamp set in Night of Navy ink.
I wanted a little bit extra detail but I didn’t want to add any gems etc that would make it unstable when I was writing in it. So I chopped off 2 bits from a Pearlized Doilly and added them to the rectangle before gluing it to the front of the cover.
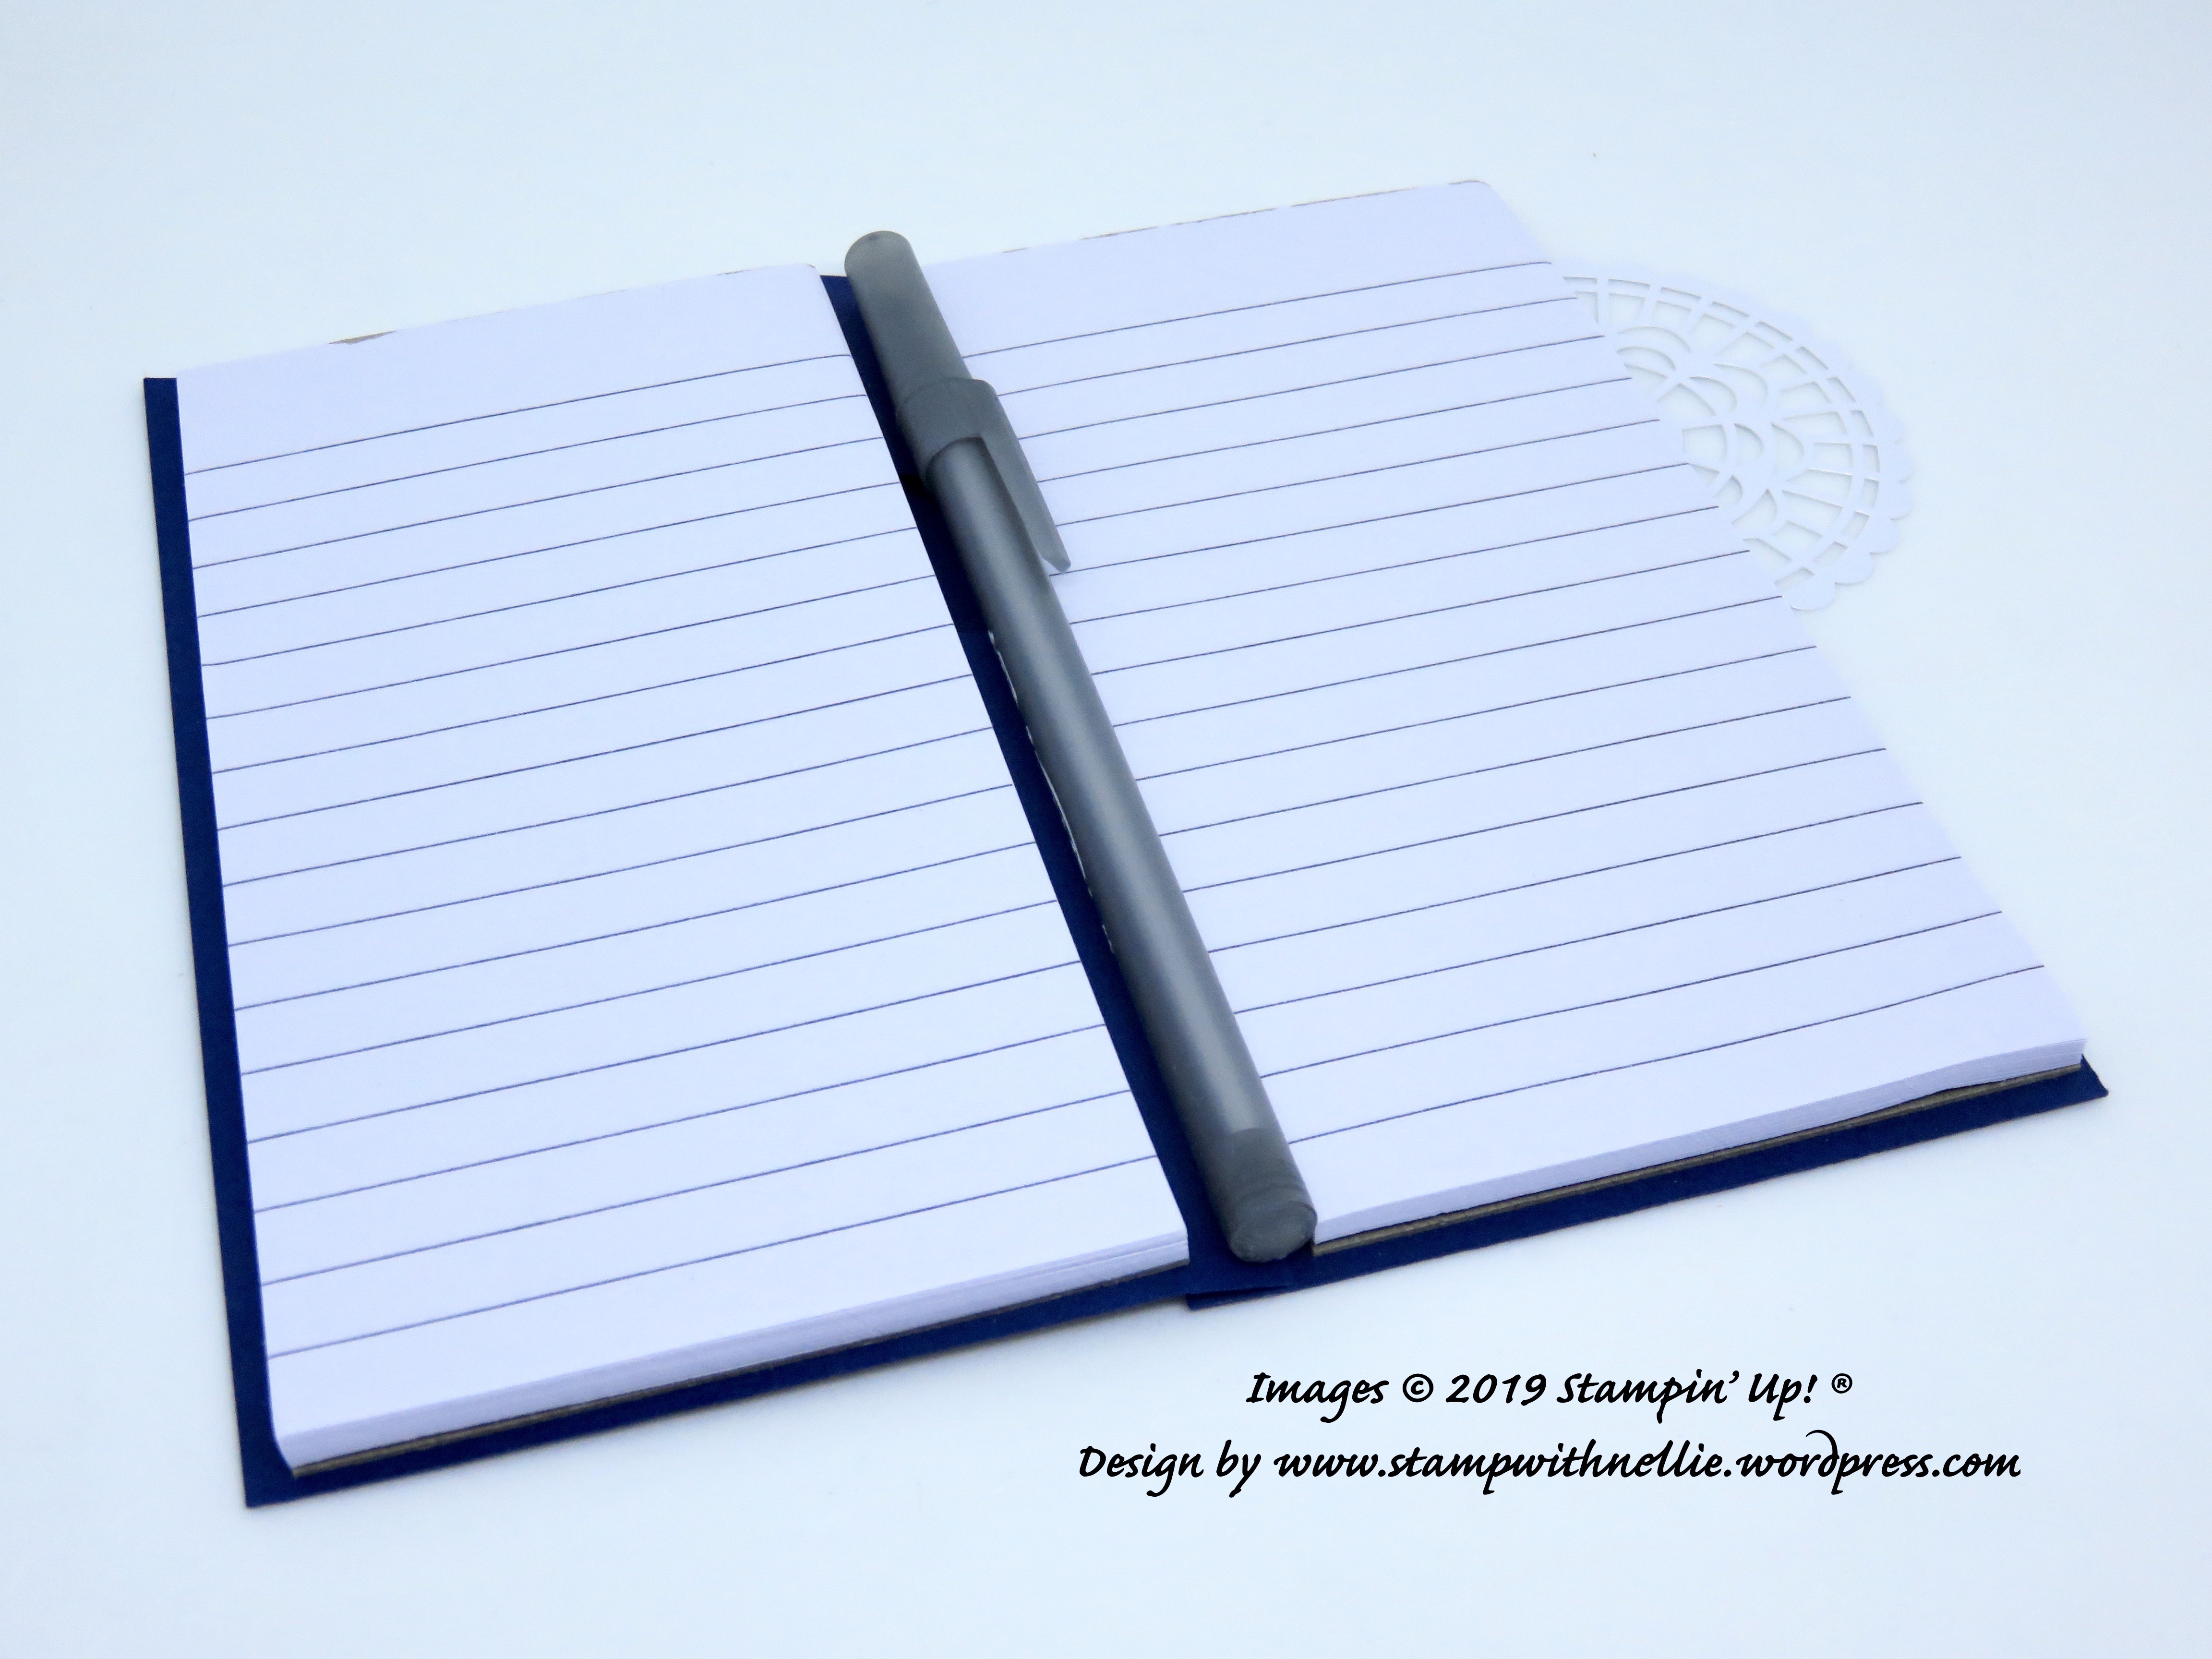
I added a note pad to the inside of both the front and the back panels. When the pen is removed from the holder these lie nice and flat ready for jotting down whatever you need to remember.
I hope you’ve enjoyed this project and will have a go at making something similar for yourself. If you have any comments or questions I’d love to hear from you.
I’ve listed the Stampin’ Up! products I’ve used below. You can click on any of them to visit my online shop at any time.
Happy crafting,
Heather x
Product List

|

|
|

|


Love the idea of the double note book Heather ..
Great tutorial.thanks
Thanks Elaine xx
Thanks so much for sharing!
Your tutorial was one of the best I’ve ever seen, the instructions were so clear and well illustrated. Awesome!
Thank you so much Audrey 😁