Hello! I had the most wonderful day on Sunday, at my first craft fair of the season. I met up with lots of lovely friends and chatted to so many people about all things crafty. And sampled lots of the delicious home baking too! I will be sharing more of my craft fair makes soon but for now I want to share my best seller. My Reindeer Days hot chocolate wrap…
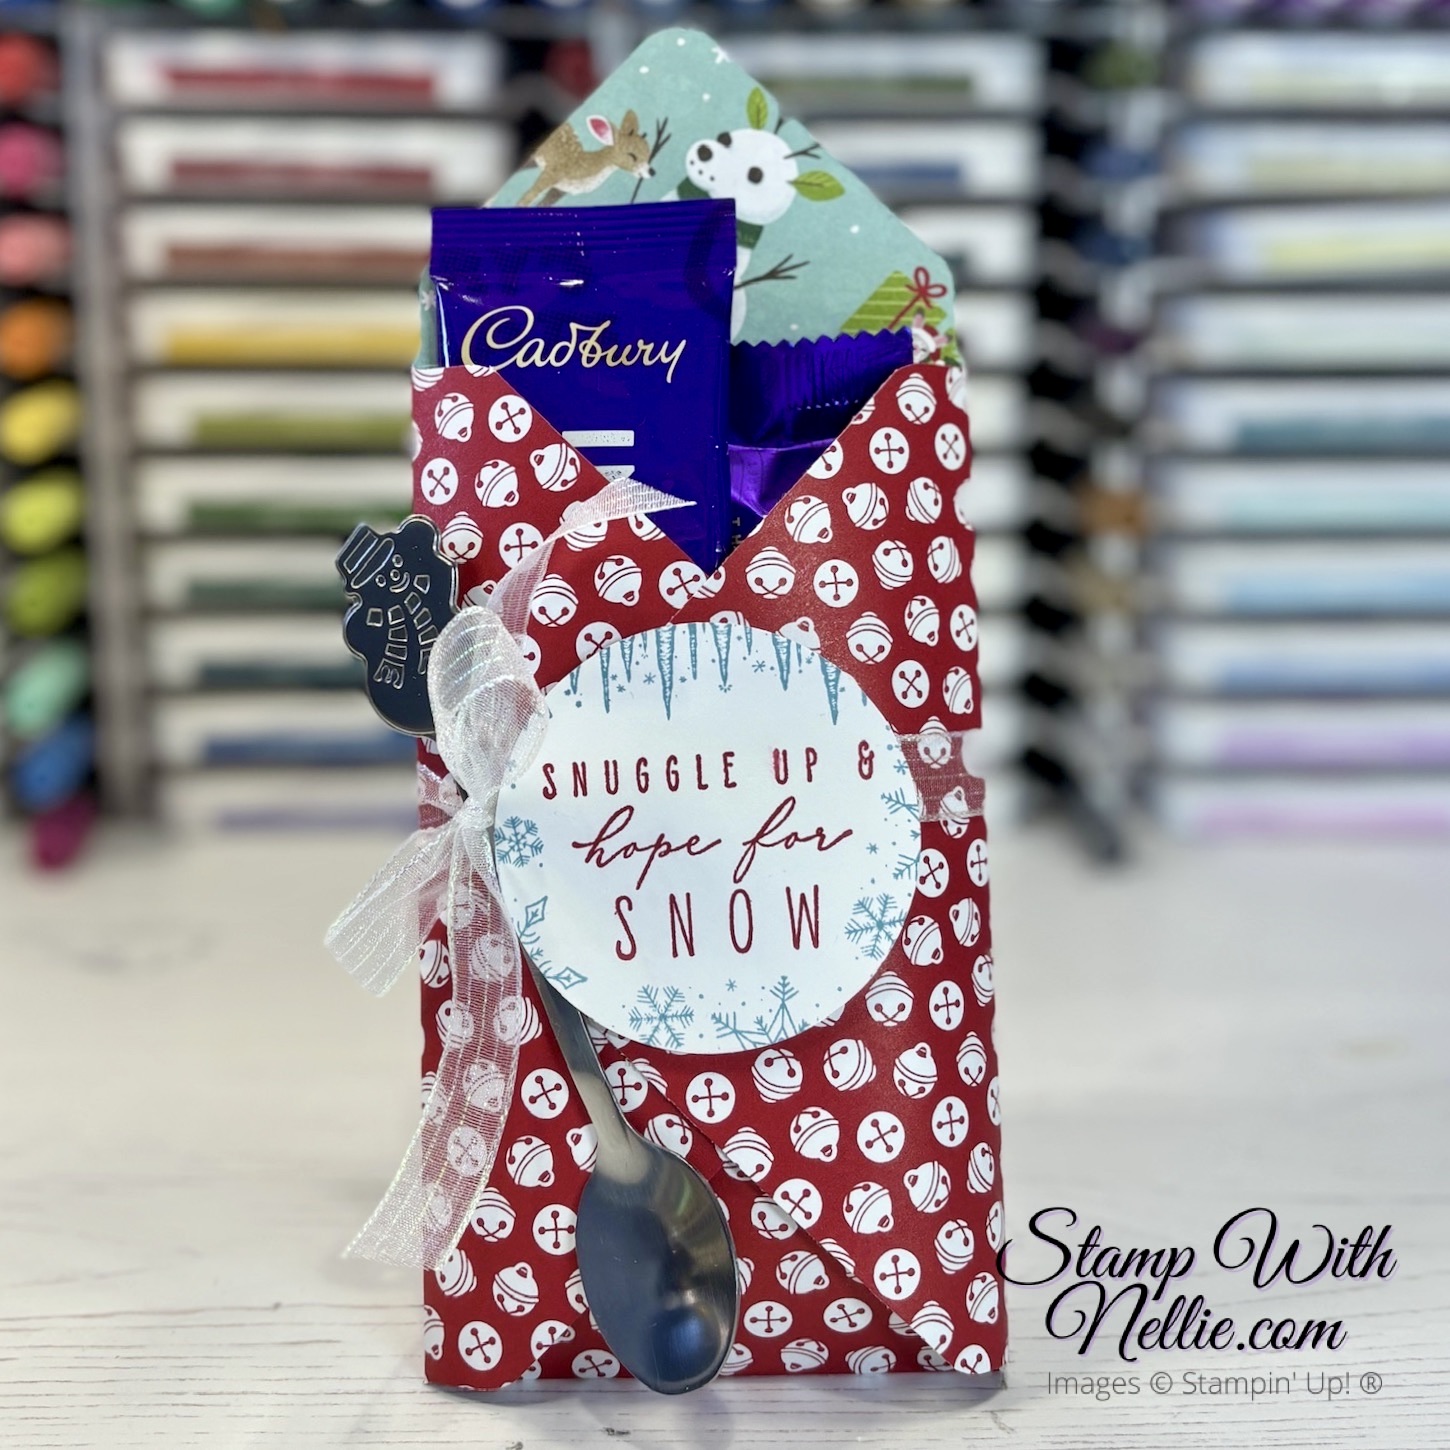
I made this original version with my beloved old envelope punch board. I used a piece of Reindeer Days DSP measuring 7-1/8″ x 7-1/8″ and made the first punch and score at 2-3/4″ (the measurements for a 3″ x 5-1/2″ envelope). As Stampin’ Up! no longer sell punch boards I decided to work out how you can make them without one. Check out my video to find out.
In the meantime, here’s a close up of the decoration I added…
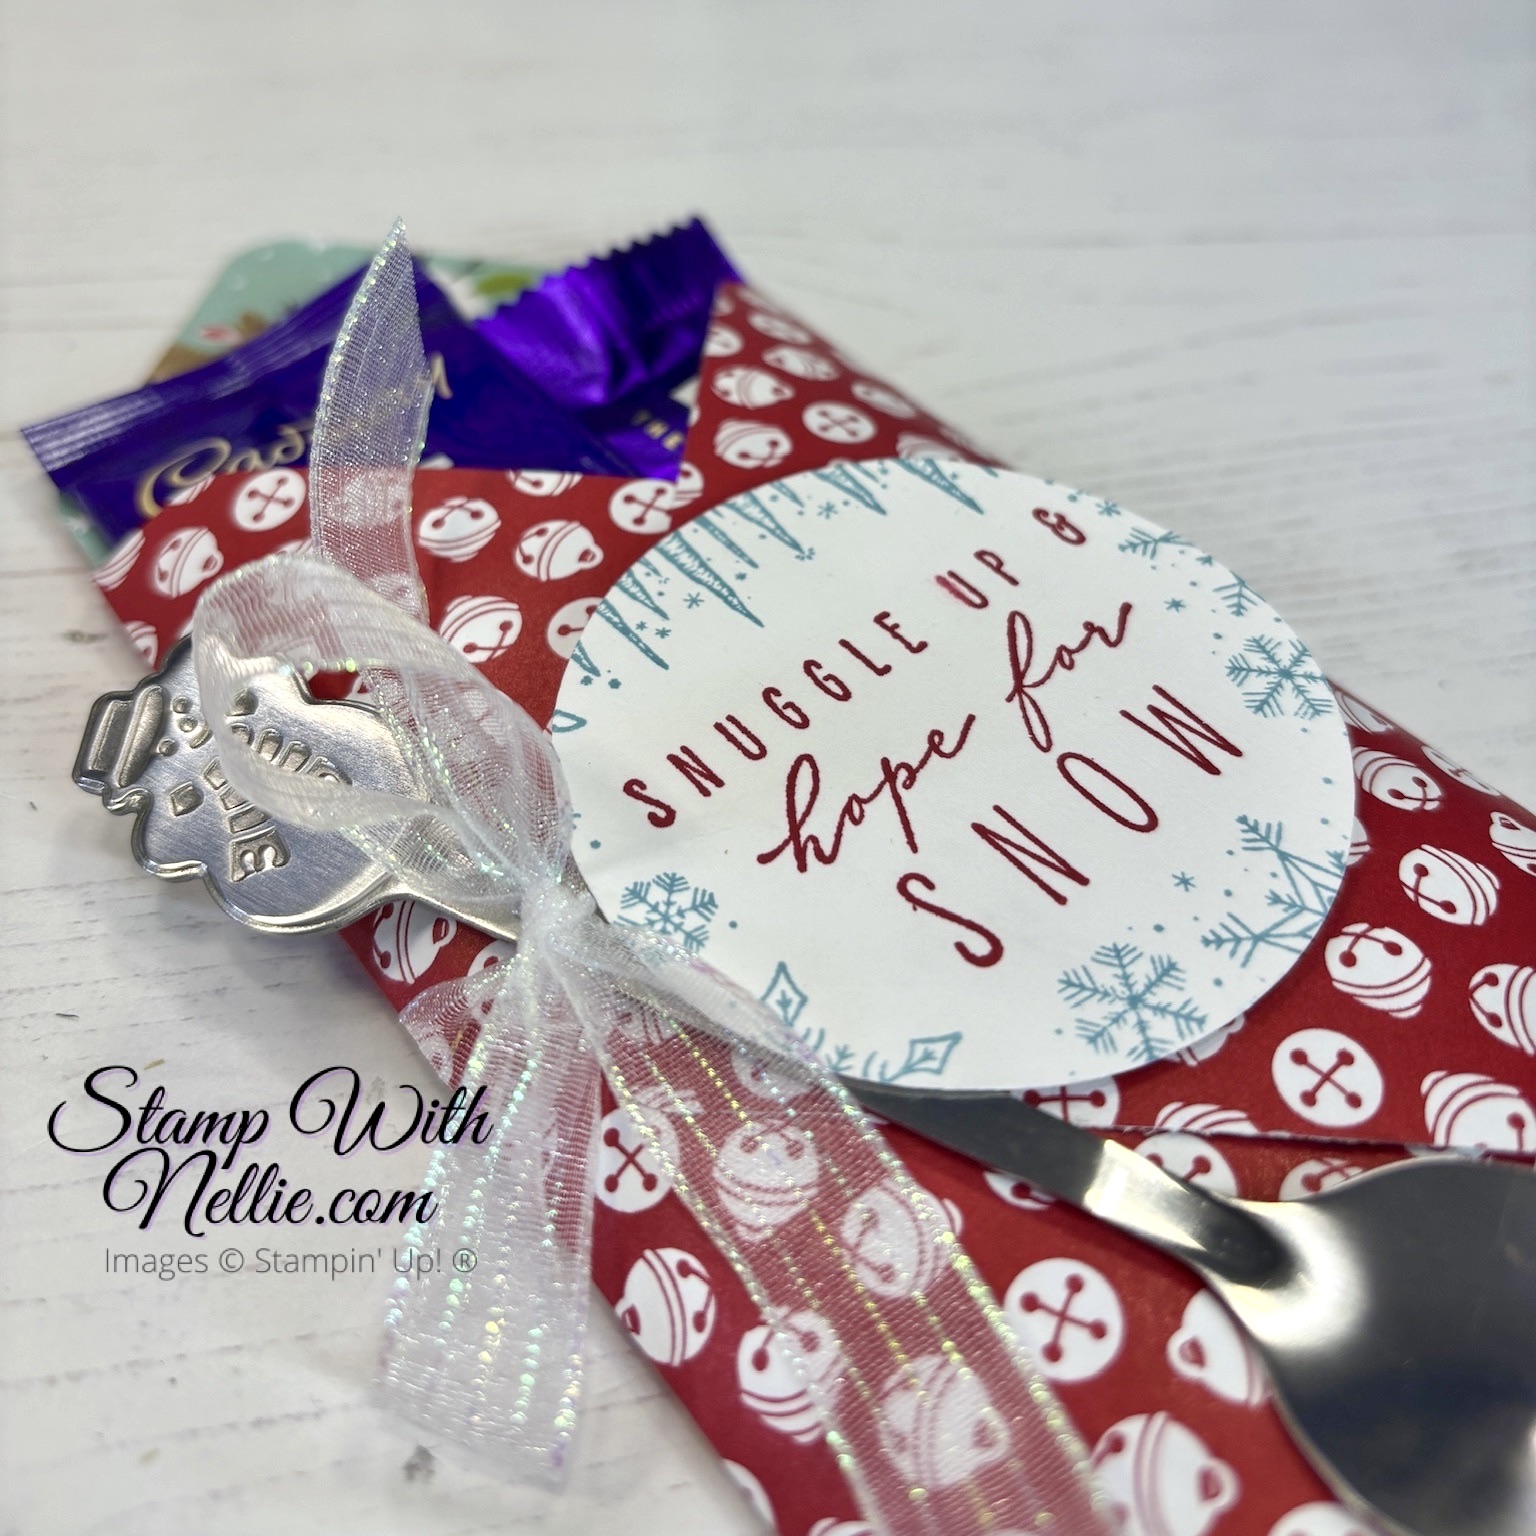
I found a pack of adorable Christmas tea spoons on Amazon and added them to my package with gorgeous ribbon. My sentiment circle was created with stamps from the Frozen Edges set, using Balmy Blue and Real Red inks.
Today’s video tutorial shows you how to make this sweet little package without the need to an envelope punch board…
youtube tutorial
I’d love you to click on the image above or if you prefer you can click here to pop over to YouTube and check out how to make this Reindeer Days hot chocolate wrap. If you enjoy watching my video, I’d love you to give it a thumbs up and leave me a comment too. If you haven’t already subscribed to my channel, make sure you do so when you’re there; so you don’t miss out on future videos.
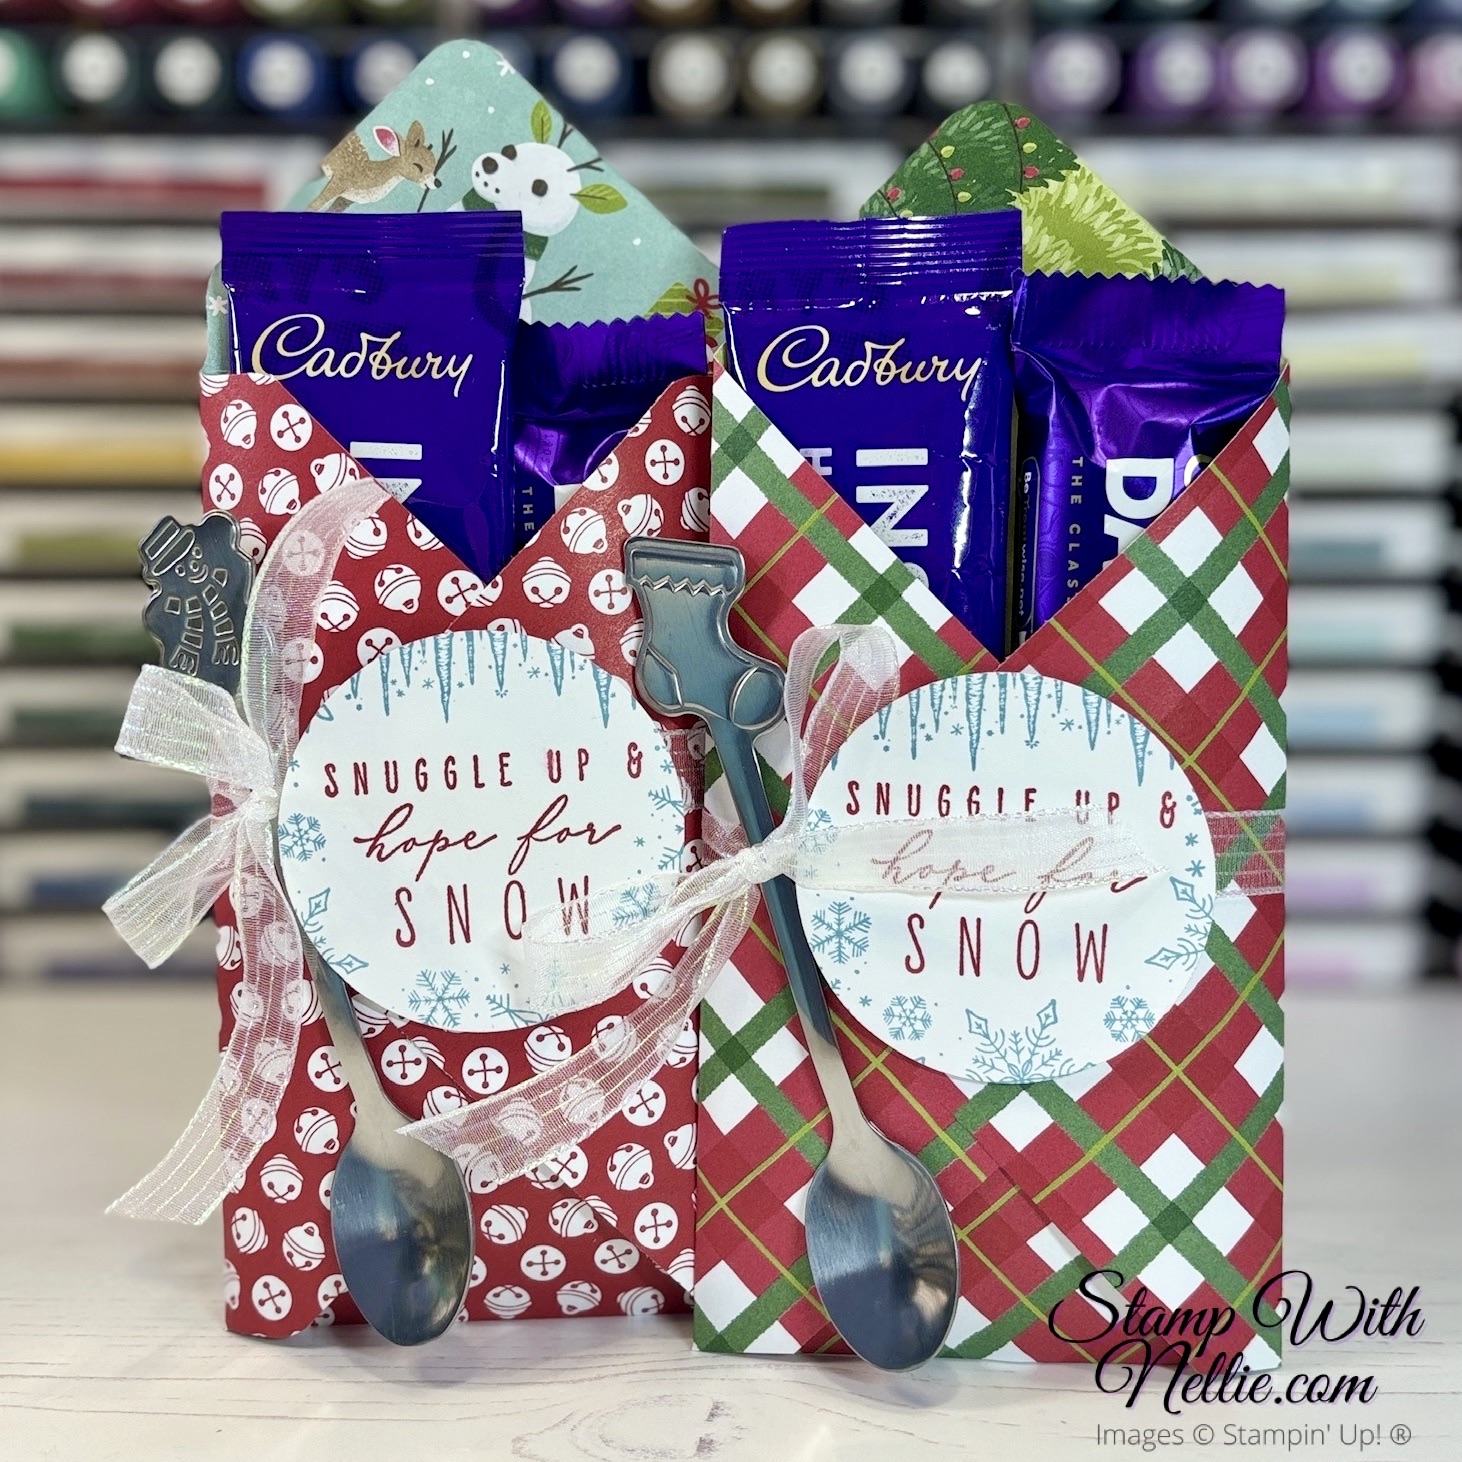
Here’s the one I made in the video along with the original…
I hope you like this sweet little gift idea, and I hope I manage to make enough of them for my next craft fair on Sunday!
MEASUREMENTS
To make the Reindeer Days hot chocolate wrap in today’s video you’ll need the following supplies:
- Reindeer Days DSP measuring 7-1/8″ x 7-1/8″
- measure & mark 2-1/2″ each side of the top point of the square (as shown in the video)
- measure & mark 2-1/2″ & 3-1/4″ each side of the bottom point of the square
- score to join up your 2-1/2″ marks, top & bottom at each side
- score to join up the 3-1/4″ marks from left to right
- cut out the triangles as shown in the video
- Basic White card to stamp with your sentiment and decoration to cut with a 2-3/8″ circle punch
- ribbon & embellishments (my cute tea spoon counts!)
SHOP THE PRODUCTS
I’ve listed the products I used for today’s project below. You can click on any of the links in the Product List to visit that item in my online Stampin’ Up! store.
CUSTOMER APPRECIATION
When you shop with me you’ll receive a handmade card and gift as a token of my appreciation. If your order is under £150 please use the current Host Code. This means that I can add in a free product to your customer thank you pack for the month. Find out more on the Host Code page in the main menu.
Happy crafting,
Heather x
Product List")
 Circle Punch")
 Designer Series Paper & Sticker Sheet (English)")


 Striped Trim")


such a clever idea to add the spoon!
Thank you so much Deborah ❤️❤️