Hello everyone.
As promised in yesterday’s InspireInk blog hop I’d like to share more information with you about this fancy fold card…
In case you missed the blog hop please click on the box below to take a look around, you’ll get lots of lovely Easter inspiration…
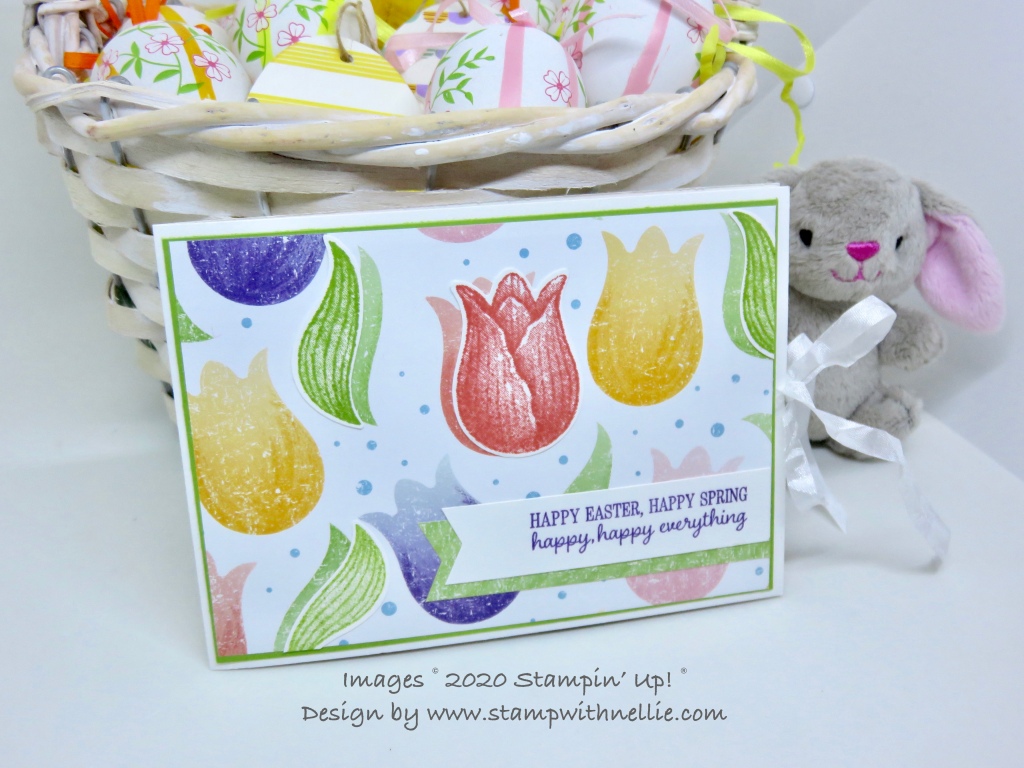
With everything that is going on in the world I do not advocate panic buying or stockpiling, but I will make an exception for the Pleased As Punch designer series paper – get it while you can because it’s only available until 31 March 2020 (unless I buy it all up before then!). All of the patterned papers I’ve used in this card come from this pack and many of the designs coordinate with punches, such as the Tulip Builder punch.
My card base is my standard one using a piece of Whisper White card measuring 29 x 10.5 cm, scored and folded at 14.5 cm. I then cut the following pieces:
- 2 pieces of Granny Apple Green card measuring 10 x 14 cm
- 2 pieces of Mango Melody card measuring 10 x 14 cm
- 4 pieces of Pleased As Punch designer series paper measuring 9.8 x 13.8 cm
- 1 piece of Balmy Blue card measuring 3 x 28 cm, scored at 7, 14 & 21 cm
- 2 piece of Pleased As Punch designer series paper measuring 2.5 x 13.5 cm – folded in half to score
- cut Whisper White card 4 times with of the 2nd smallest rectangle Stitched So Sweetly dies and once with the 2nd largest one
- a piece of Whisper White card for the sentiment measuring 2 x 8.5cm
- a piece of Please As Punch designer series paper measuring 2 x 9 cm to back the sentiment.
You will also need some more Whisper White card to stamp and punch the tulips and leaves.
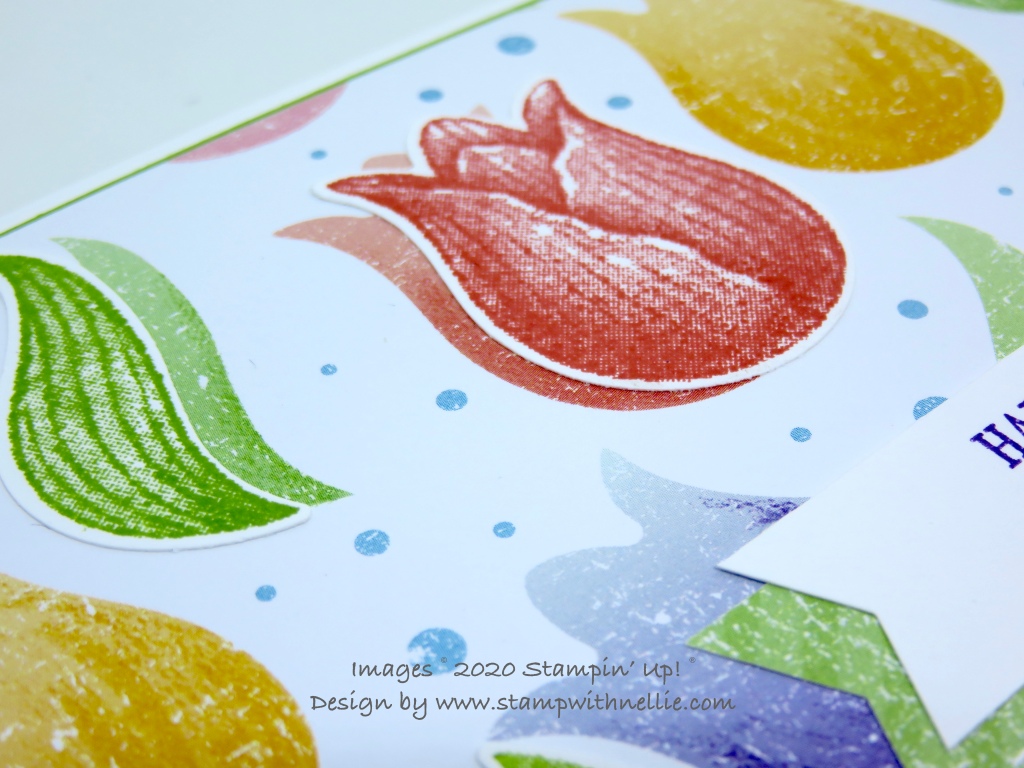
I stamped the large tulip from the Timeless Tulips stamp set with Calypso Coral (twice), Gorgeous Grape, Blushing Bride and Daffodil Delight inks. I stamped the leaves with Granny Apple Green ink, some full strength and some with second generation ink (meaning that I stamped again before inking up my stamp again). These were all cut with the coordinating Tulip Builder punch.
Stamp the sentiment for the front of the card with Gorgeous Grape ink and cut banner ends in this piece and the corresponding piece of designer series paper.
Now you’ve got all the pieces you need it’s time to assemble. Add your largest pieces of Pleased As Punch designer series paper to the Granny Apple Green and Mango Melody card.
Before you add your panels to the front and back of the card you’ll want to add some lengths of ribbon. This card is pretty chunky with all the layers that get added, so the ribbon will help to keep it closed. Putting this under the card panels on the front and back of the card will keep it secure.
Add your sentiment to the card front and the banner piece behind it…

I also added some of the punched leaves and a tulip to the card front slightly offset, to add a bit more detail.
Add panels to the inside of your card as shown below….

Add the 2 left over pieces of designer series paper to the piece of Balmy Blue card, lining up the middle score lines. To add this piece to your card you need to line up the middle score line with the centrefold of the card, add glue to the section at one end and adhere it to the card. Fold up the blue piece in a concertina fold, add glue to the end and then close the card up to adhere it to the card base. Allow to dry for a minute or two and then when you open it you should have this W shape.
Stamp the tulip stems in Granny Apple Green ink onto the Stitched So Sweetly die cuts. Again I stamped one in full strength then stamped the next one without re-inking to get 2 different shades. Add your punched leaves and tulips to each of these and then add them to the inside of your card.
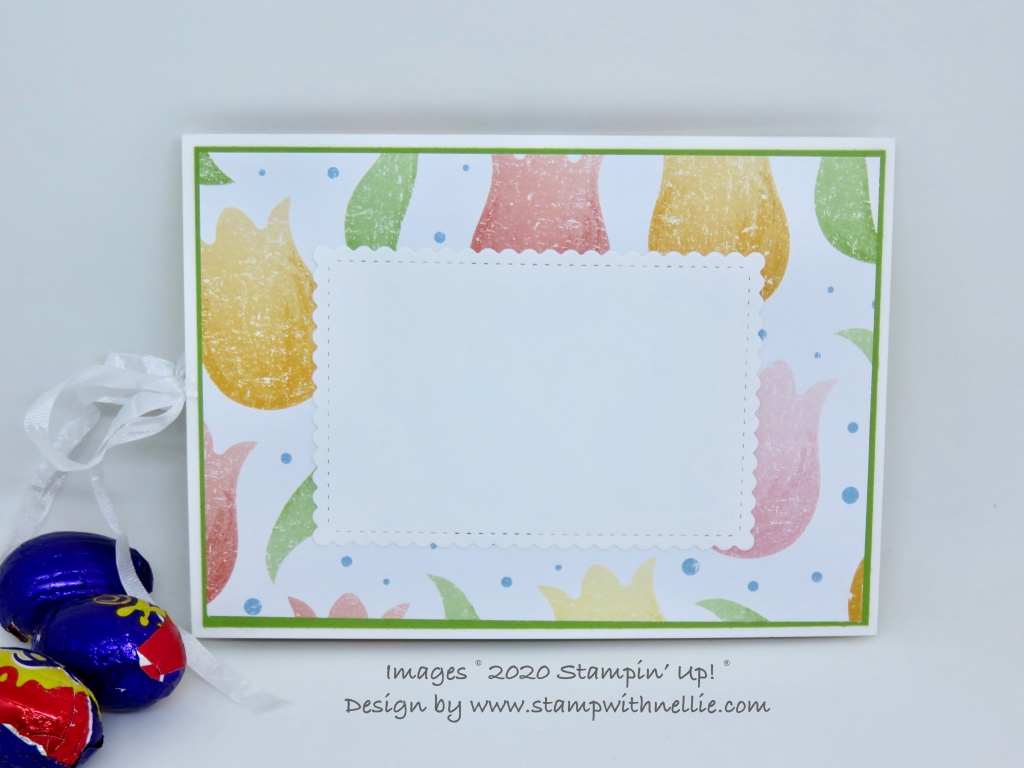
The remaining large die cut is added to the back of the card so that you can write an Easter message for the recipient
I hope this all makes sense. If you have any questions please just let me know.
I’ve listed all of the products I used for this card below. You can click on any of the links to visit my online Stampin’ Up! store at any time. But remember, if you want to get the Pleased As Punch designer series paper then you need to be quick.
Happy crafting,
Heather x
Product List ") |  | |
 |  |  |
 Blushing Bride Classic Stampin’ Pad [131172] £6.00 | ||


 Crinkled Seam Binding Ribbon")
Leave a Reply