Hello and thanks for joining me.
I love crafting with card, paper, ink, ribbon and other embellishments. However, it can be a solitary past-time so whenever I get the chance, I like to craft with others. And if you aren’t friends before you craft together there’s a pretty good chance that you’ll be friends afterwards! We all like to be able to chat to like-minded people about our passions.
So, when the lovely Valerie Broomfield of Valerie’s Handmade Gifts invited me along to craft with her friendly group of ladies last week I jumped at the opportunity. Not only did I get the chance to meet these fabulous ladies, we had lots of crafty chat and I learned a new technique which is shown in the card I made with them…

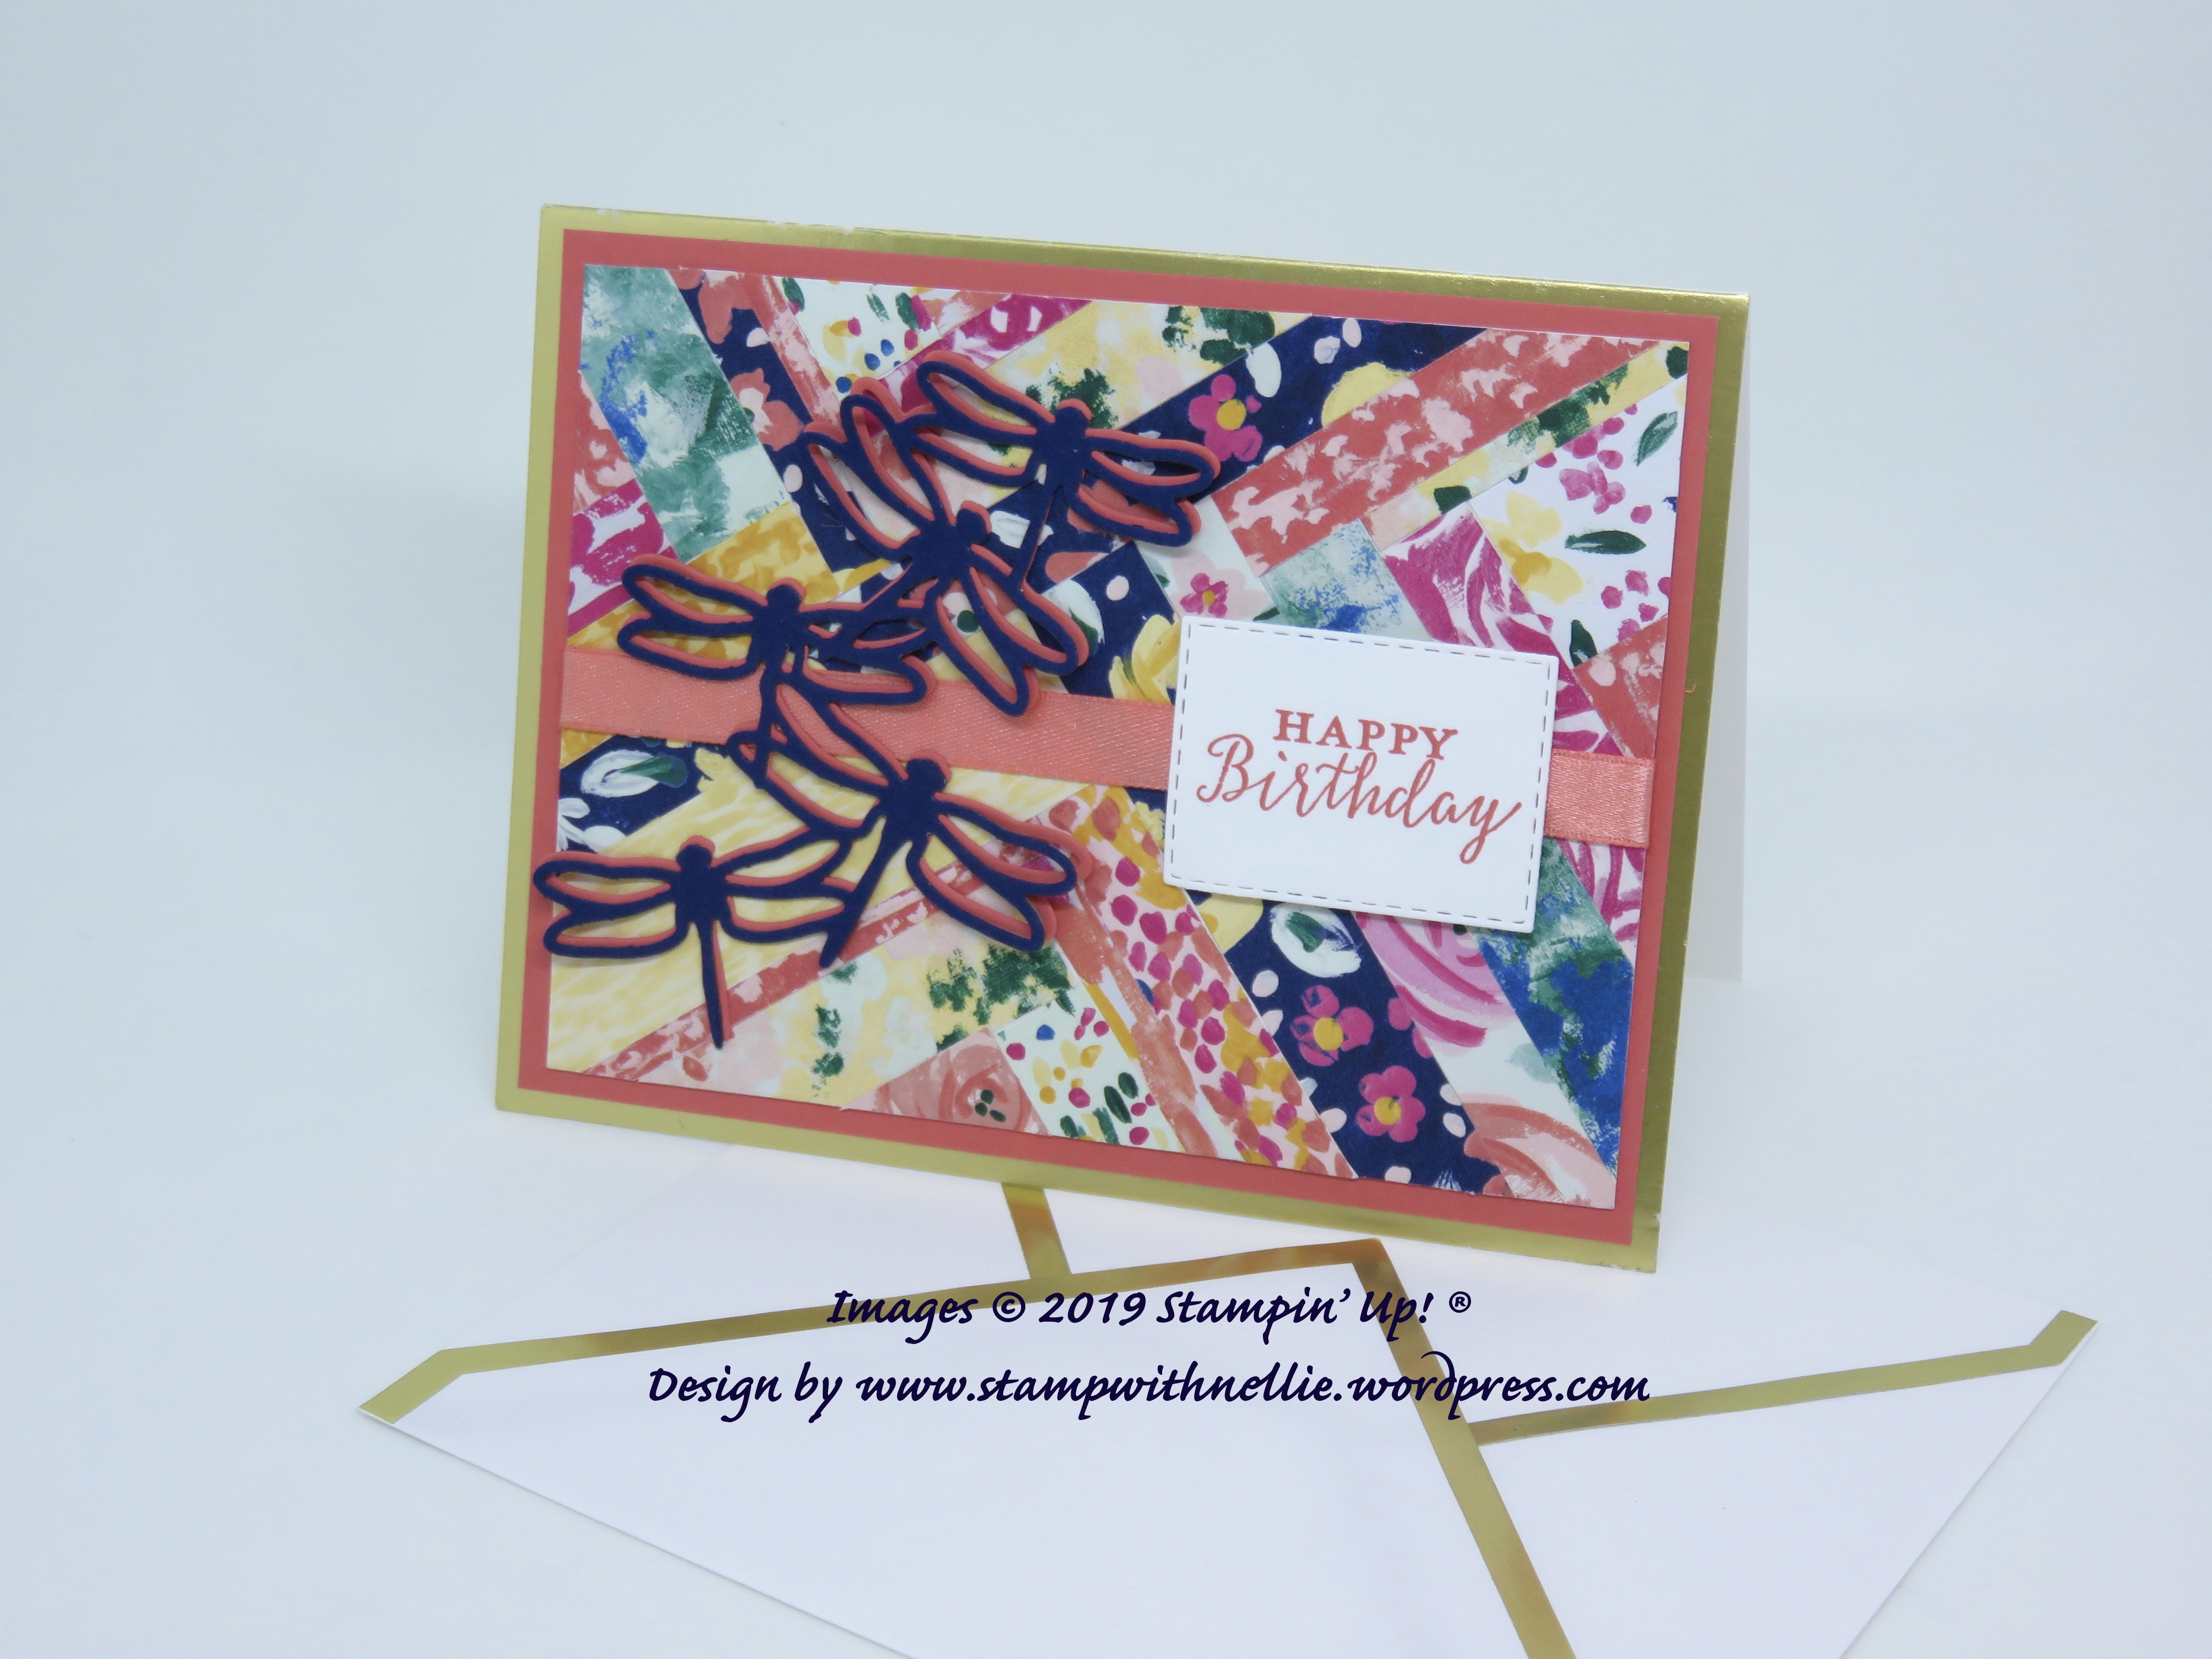
The background to the card is known as the Herringbone technique and is perfect if, like me, you hoard lots of lovely little strips of designer series paper (DSP) that are leftover from other projects.
We started with a piece of Whisper White card measuring 5 by 3 & 3/4 inches then added this to Adhesive Sheet and trimmed it to the same size. This means that the whole surface remains sticky until you cover it with your DSP strips. My DSP of choice was Garden Impressions.
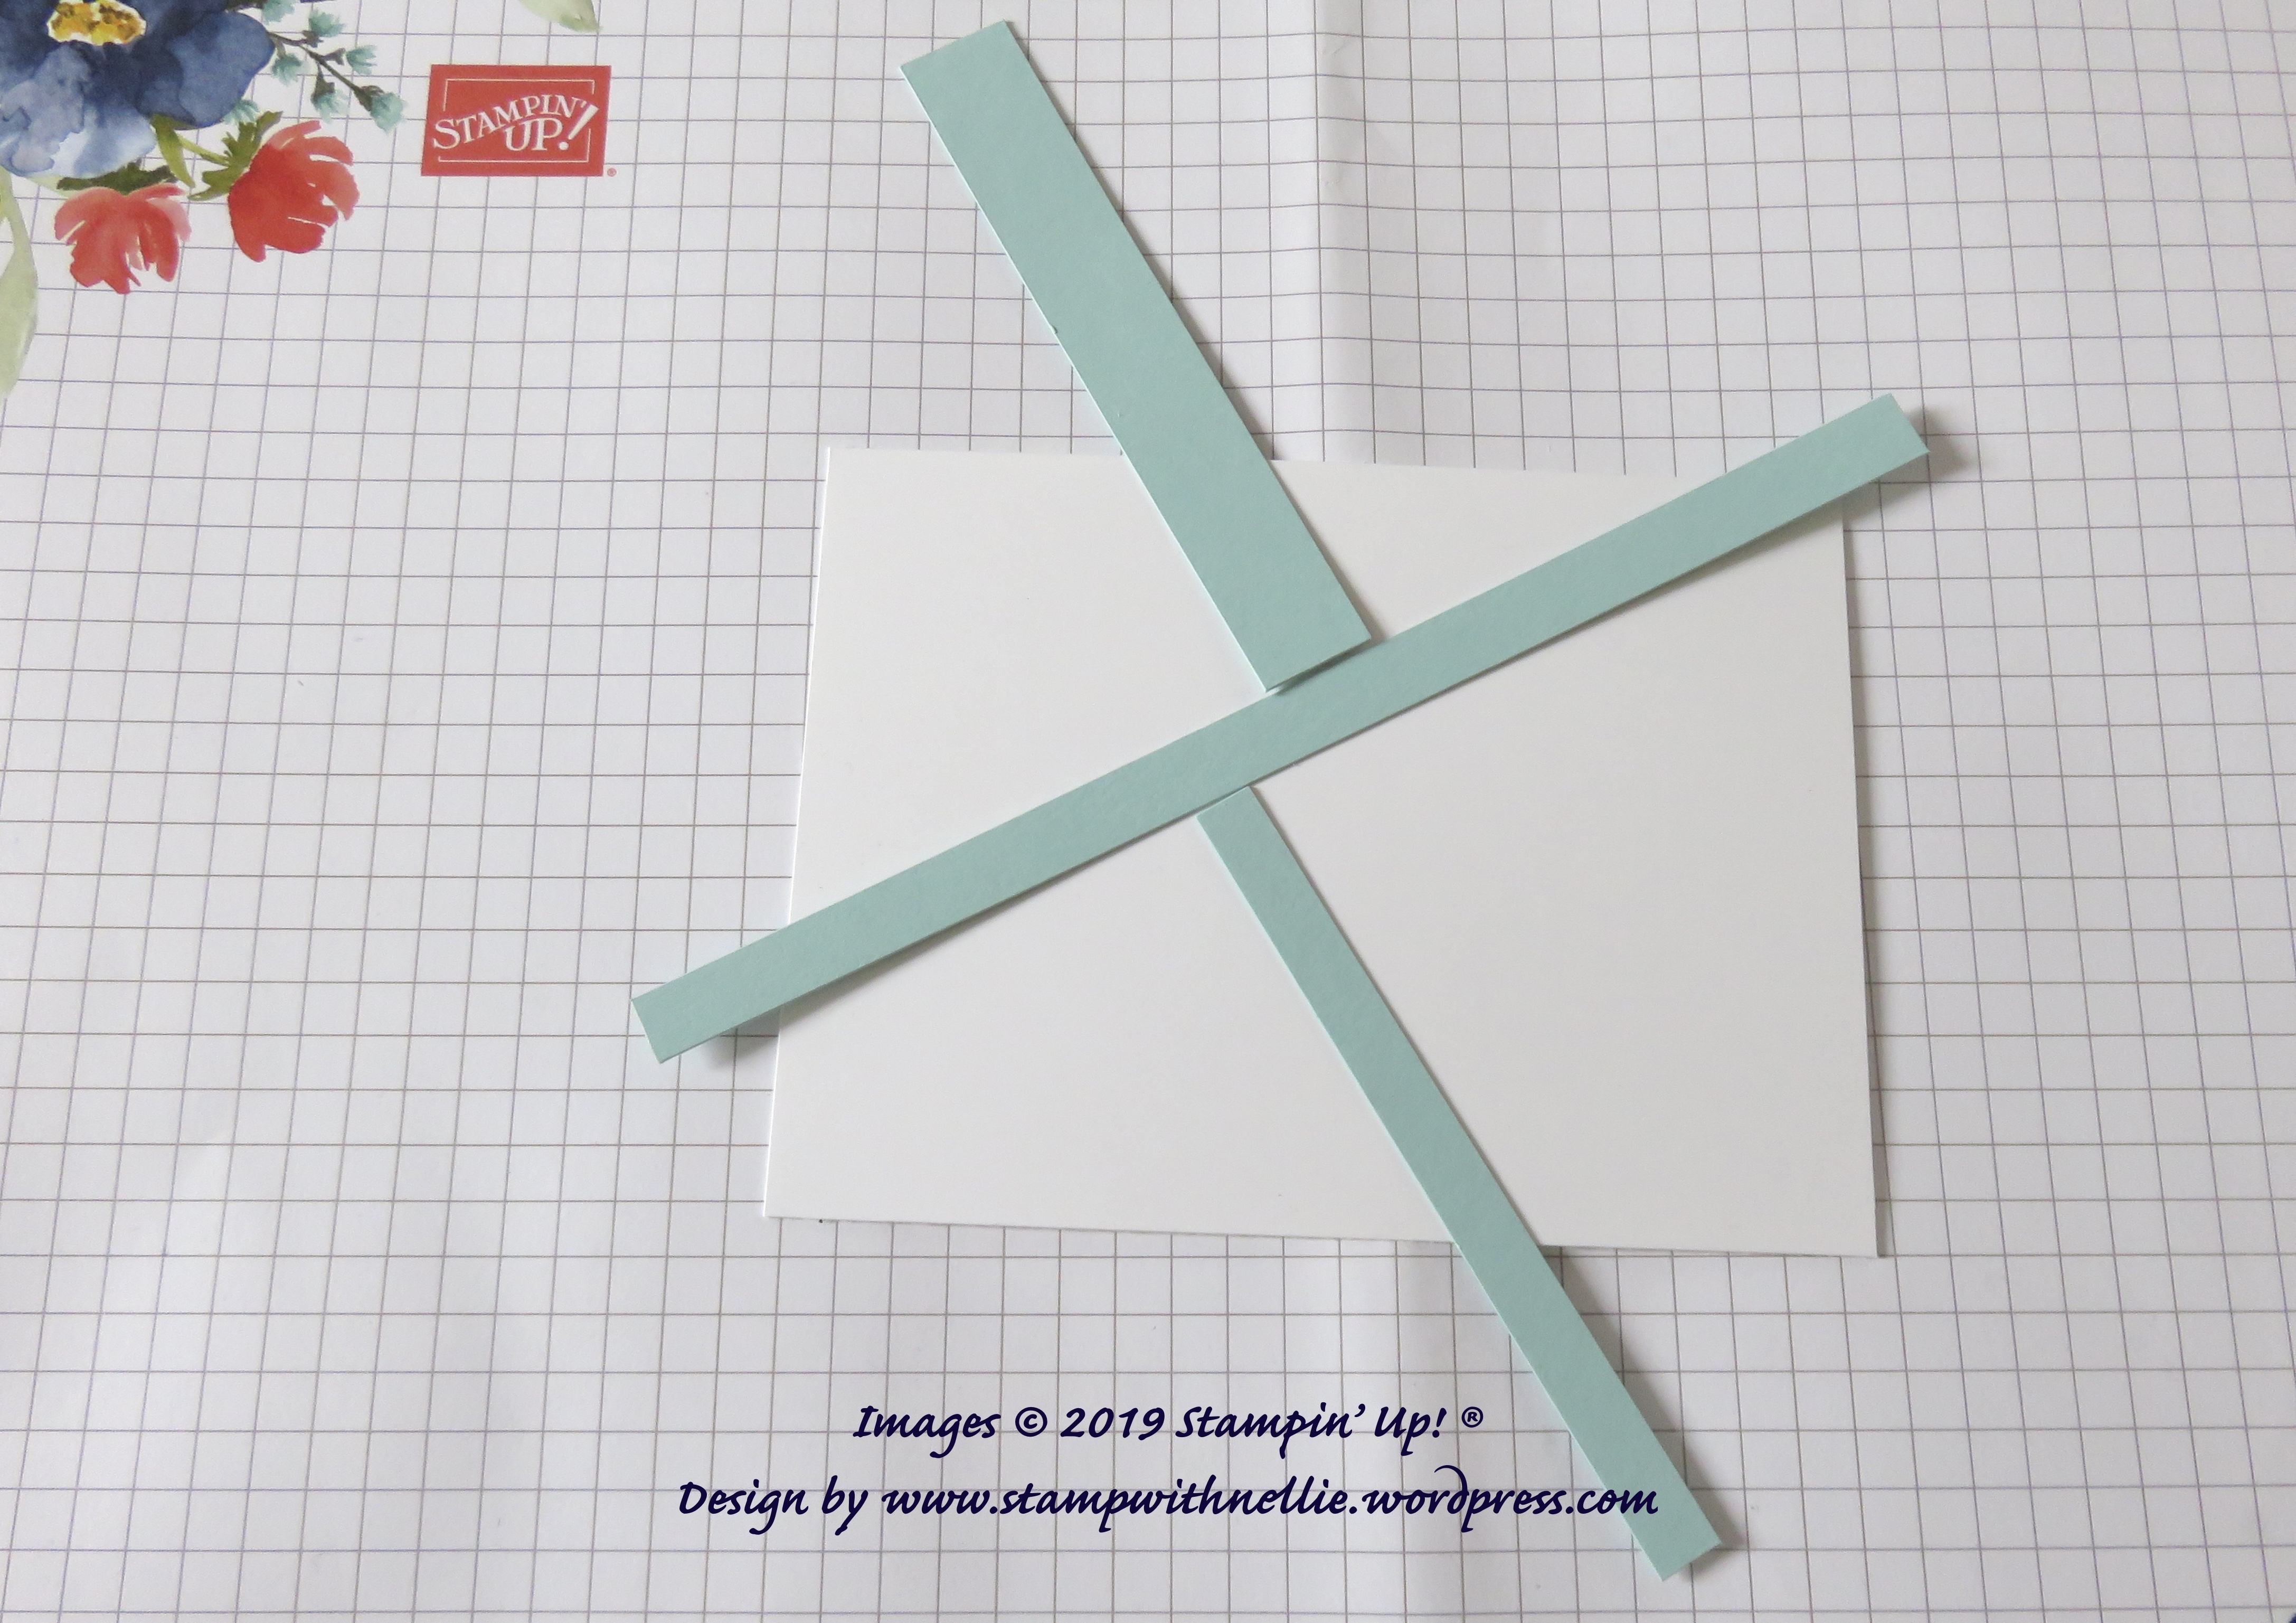
Valerie’s tip was to add 3 diagonal strips to effectively split your card into 4 distinct areas and work on 1 area at a time. One of the other ladies in the group shared the idea of using the backing from the adhesive sheet to cover the area you weren’t working on so you didn’t accidentally stick anything to it while you were working. Great tip, probably because she’s seen me craft before, lol!

Once you’ve got your sections you just start butting up a strip against one of the strips you’ve already added. You then add another at a 90 degrees angle to the last one and continue to do this until your section is full. I then trimmed the overhanging pieces before moving onto the next section. I hope this photo makes that process a little bit clearer…

(and ignore the ragged edges, these strips were rescued from my bin for demonstration purposes only! Lol)
Once your background is finished you can decorate your card however you wish. We all did something completely different! That’s creativity in action.
I matted my background on Calypso Coral card, added Calypso Coral ribbon and the group of dragonflies in Calypso Coral card using the Detailed Dragonfly Thinlits dies. The dragonflies looked a bit lost on the background so I cut them again in Night of Navy and offset them slightly. I only glued the bodies so the wings have a little bit of dimension…

I then stamped Happy Birthday from the Detailed With Love stamp set in Calypso Coral ink onto Whisper White card and cut it with one of the Rectangle Stitched Framelits dies. I added that with dimensionals.
The whole lot was then added to one of the lovely Gold Foil-Edged cards that were introduced in the Autumn/Winter 2018 Catalogue but are still available now. These come with matching envelopes…

I hope you’ve enjoyed today’s project. I certainly enjoyed making it!
I’ve listed the products I’ve used in this card below. You can click on any of them to visit my online Stampin’ Up! shop. Remember to use this month’s Host Code when you shop, to make sure you get the rewards you deserve (see my Host Code page for more details).
Happy crafting, especially if it’s with friends!
Heather x
Product List


A lovely card ,Heather .
Love the idea .xx
Thanks Elaine xx
Great for using up the scraps too! TFS! Very Pretty!
It gives us an excuse to save even the skinniest scraps now too, lol x
Crafting with friends sounds like a fabulous way to spend a day. Beautiful card Heather, maybe I need to rethink my craft room declutter after all 😂 Xx
Ha, ha! Don’t blame me if you start hoarding even skinny bits of DSP now, blame whoever came up with this pattern in the first place!! Lol xx