Hello
The Gold Striped Treat Bags are luxurious looking and are food safe, so they’re great for gifting little treats such as cookies. However, they are pretty flat so what you can give is a little limited by that.
Well you can change that easily with a few steps:
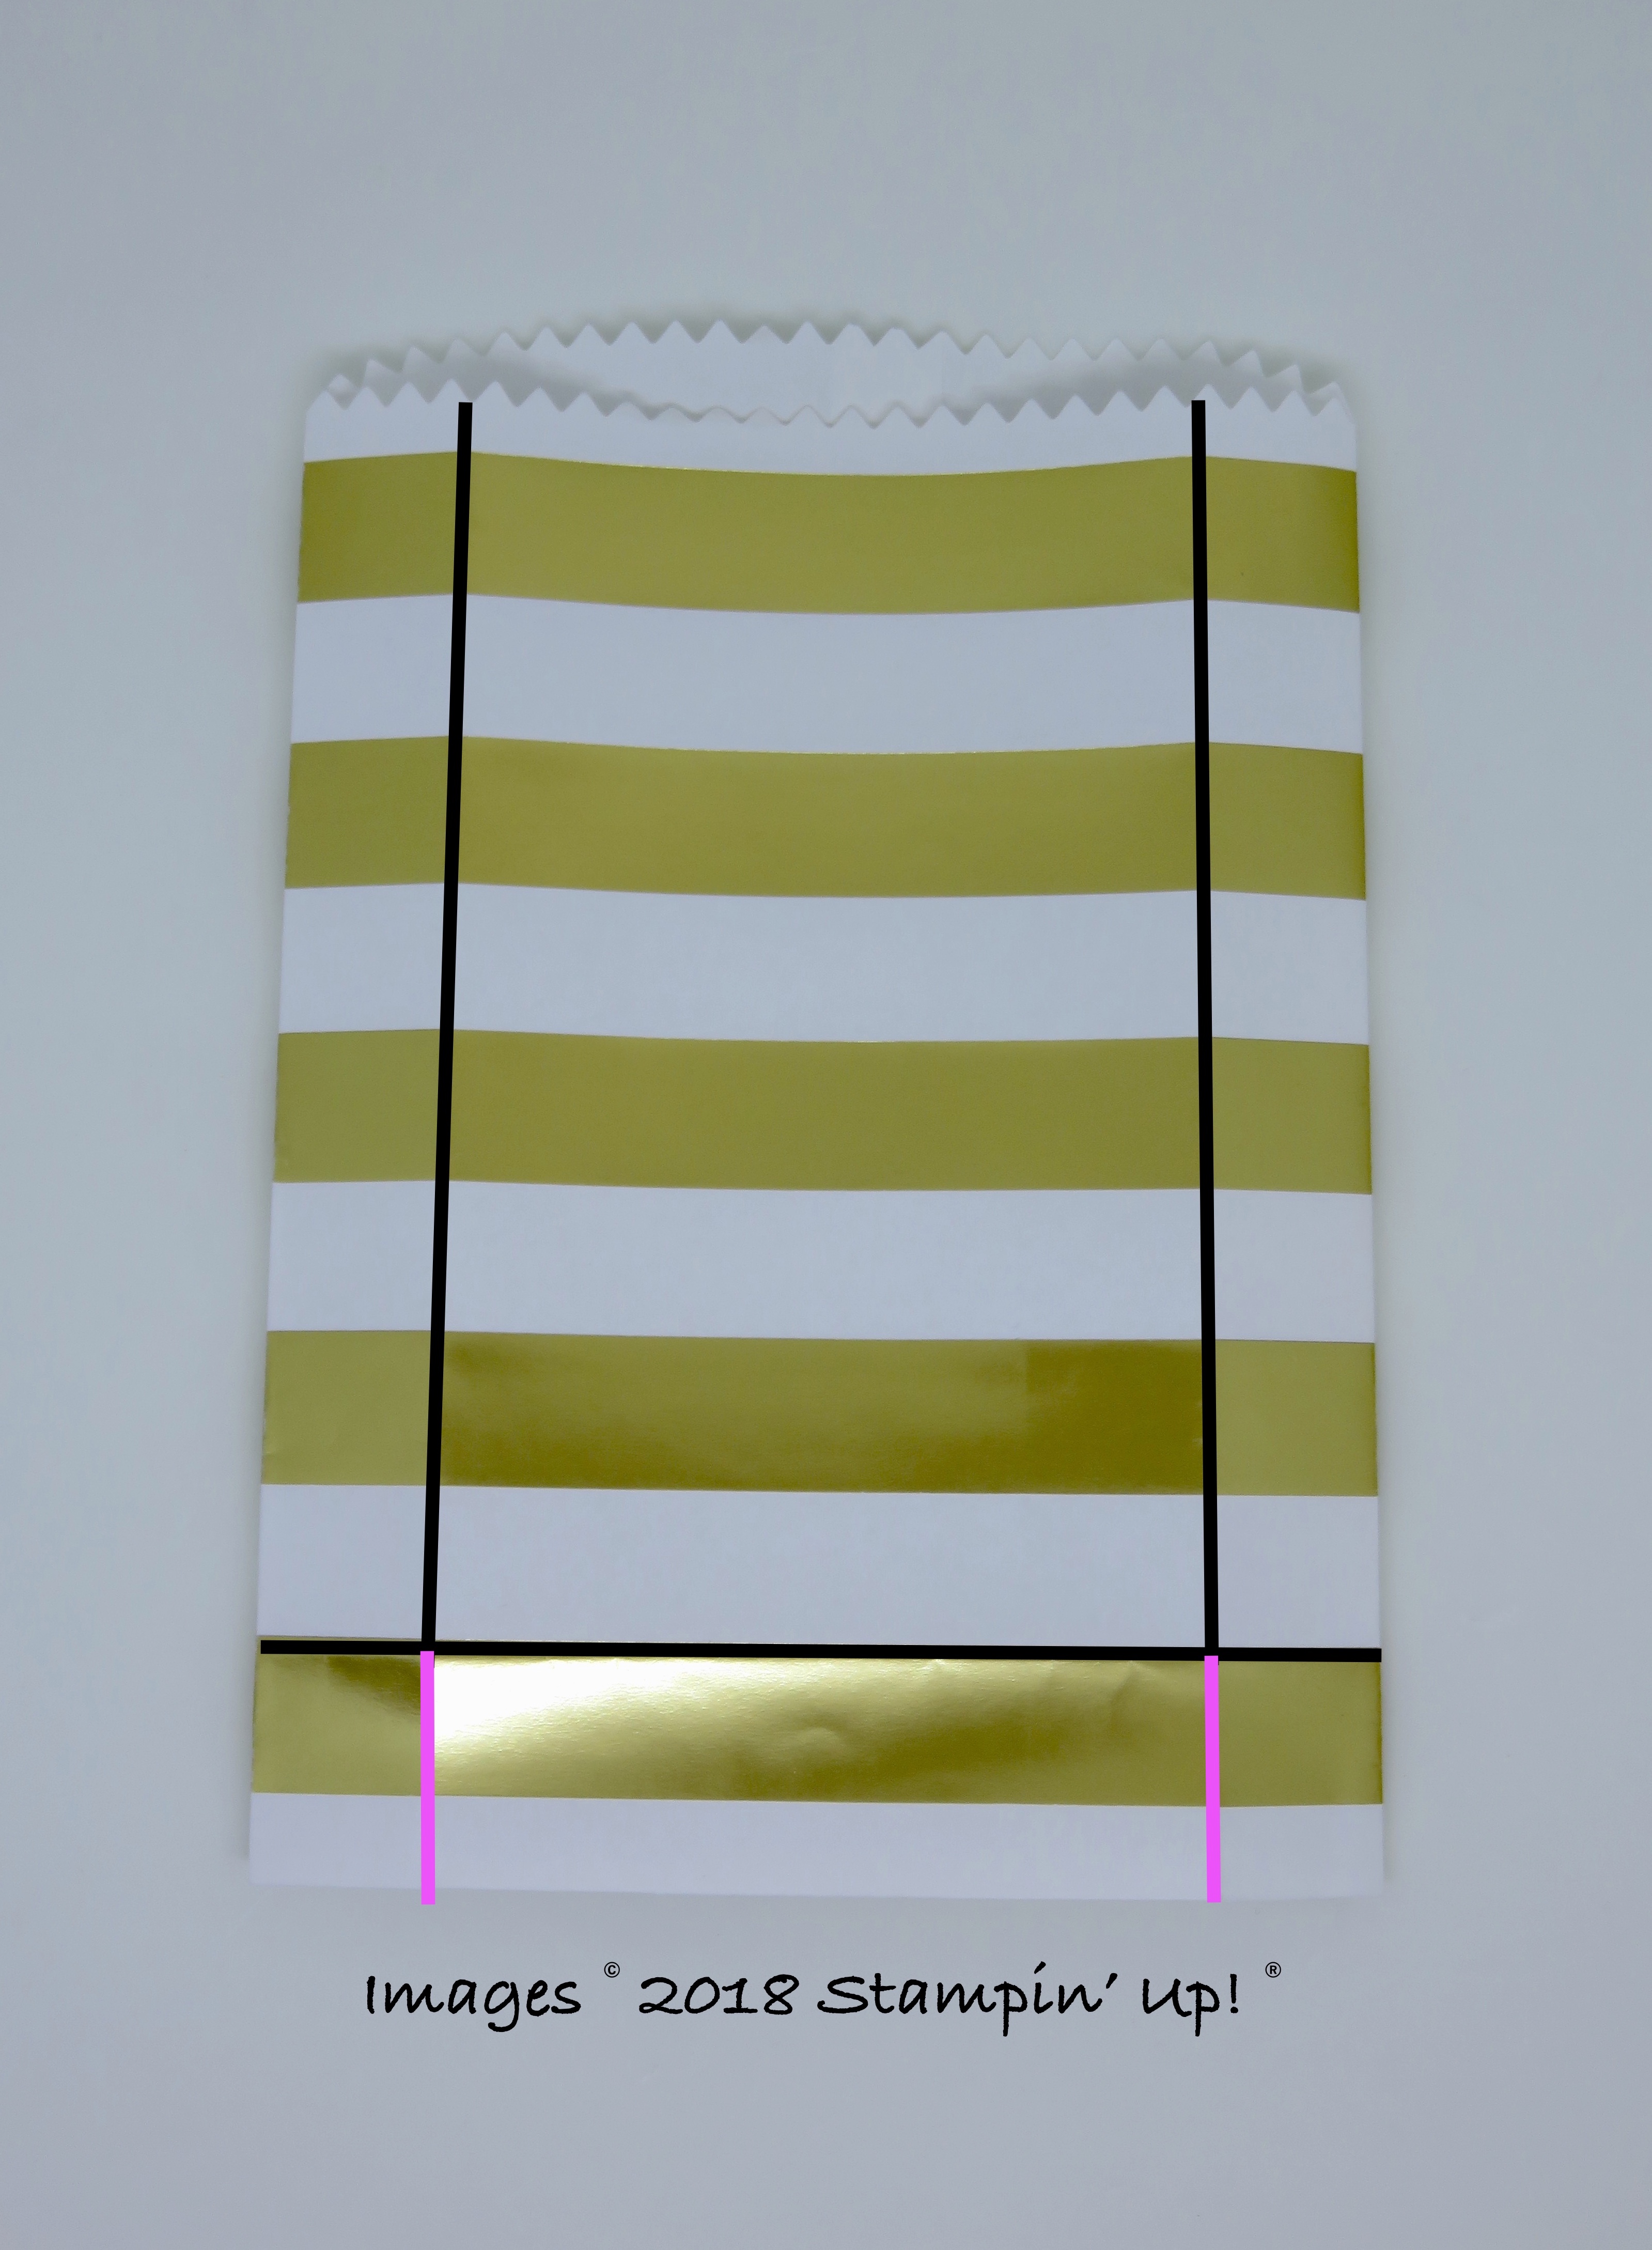
- trim about 1/8th of an inch off the bottom of the bag
- with the long side at the top, score at 1 inch
- ignoring the top of the bag with the zig zags, score the other 2 sides at 3/4 of an inch
- from the bottom, cut up the score lines on each side to the horizontal score line
- fold and burnish your new score lines with a bone folder
- fold the original sides of the bag the other way to form the new gusset sides
- fold in the side tabs you created, then the back and finally the front tab and glue to create the new base, just as you would for the bottom of any bag or box

The black lines are your score lines and the pink lines are where you cut.
Now you can decorate your bag and fill it with sweeties, tea lights, jewellery etc
I simply folded over the top of the bag, added a pearlized doily folded in half (but to show the white side rather than the pearl side), made a tag, threaded it with gold mini sequin trim and secured with a gold library clip.

For my tag, I used Whisper White card and stamps from Perennial Birthday in Versamark ink and Gold Stampin’ Emboss powder and heat set it. I punched it with my 2 inch circle punch and then created a hole for the sequin trim with my 1/8th inch punch.

You could obviously change the tag and make a Christmas gift bag that would look great under any tree!
I hope you’ve enjoyed today’s project. I’ve listed all of the products used below and you can click on any of them to visit my online Stampin’ Up! shop.
If you have any comments or questions on this project or any Stampin’ Up! product I’d love to hear from you. You can comment below or use the Contact Me form in the menu above to get in touch.
Happy crafting,
Heather x
Product List
|
|
|
|
|
|
|
|
|
|
|
|
|
|
|


Leave a Reply